guides
How to Grow Mushrooms Indoors: Step-by-Step Guide
Grow oyster, shiitake, and specialty mushrooms at home with a grow kit or substrate block. Covers humidity, fruiting, harvesting, and reflush tips.
 Priya Anand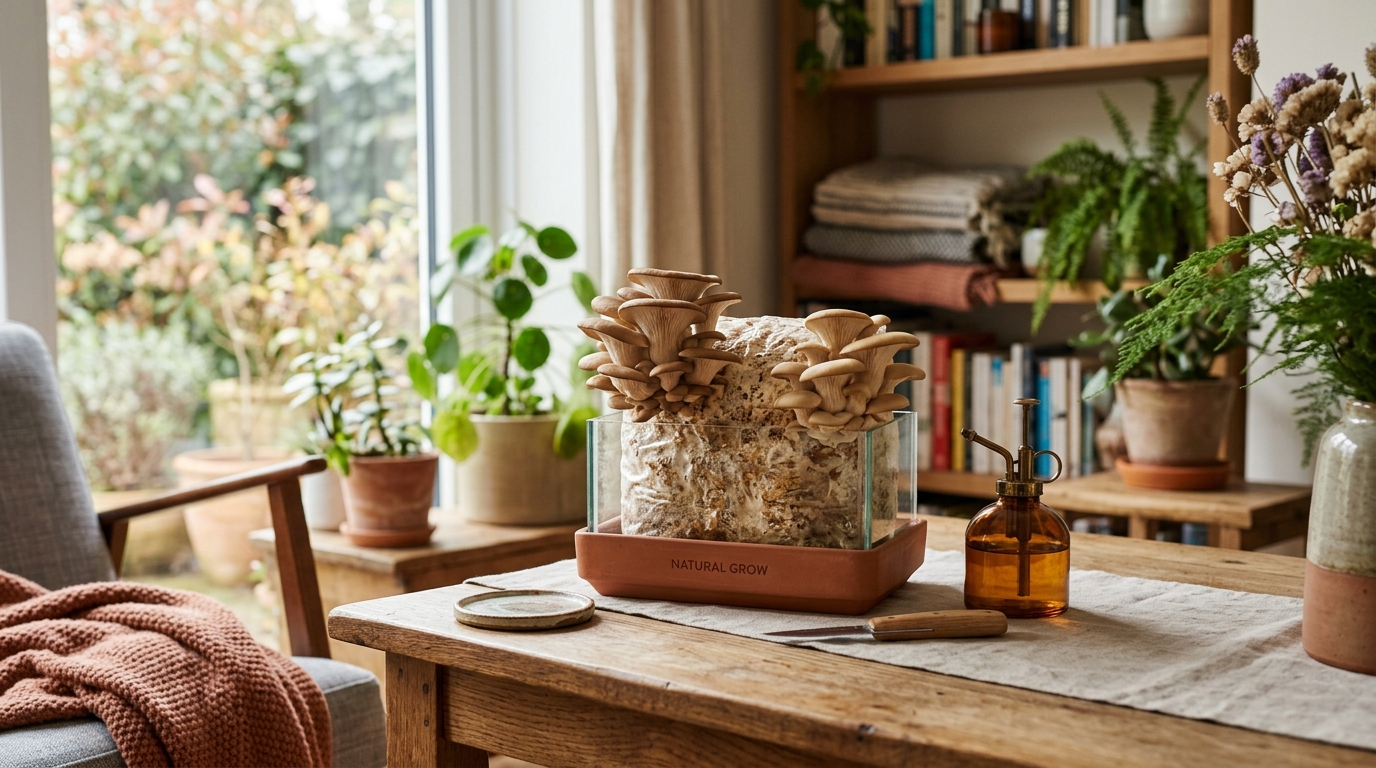
Growing mushrooms indoors is fastest with an oyster mushroom grow kit — pre-inoculated substrate blocks that fruit in 1–2 weeks with just water, humidity, and indirect light. Oyster mushrooms are the best variety for beginners; shiitake is the top runner-up for deeper flavor and a slightly longer growing cycle.
Why grow mushrooms at home?
Specialty mushrooms at a grocery store cost $8–20 per pound — when you can find them at all. Oyster, lion’s mane, and shiitake varieties are often unavailable outside farmers markets or specialty grocers. A single grow kit costing $25–35 can produce 1–3 pounds of mushrooms across 2–3 flushes, making the economics hard to argue with.
Beyond cost, home-grown mushrooms are harvested at peak freshness. Oyster mushrooms lose texture and flavor noticeably within 2–3 days of harvest; growing your own means eating them within hours of picking. The process is also genuinely low-effort compared to most indoor growing — mushrooms require no soil amendments, no fertilizer, no grow light, and no complicated schedule. Just warmth, humidity, and some daily attention.
What type of mushroom should you grow indoors?
Oyster mushrooms (best for beginners)
Oyster mushrooms are the most beginner-friendly species by a wide margin. They colonize substrates quickly, tolerate a broad temperature range (55–80°F), fruit reliably from commercial grow kits, and produce multiple large flushes. Pink and golden oyster varieties fruit fastest; blue and pearl oyster are the most common in kits and have the most versatile culinary flavor.
Shiitake mushrooms
Shiitake take longer to fruit on a fresh log or block (60–120 days when inoculating from scratch) but pre-colonized ready-to-fruit shiitake blocks are available from specialty suppliers and fruit within 1–2 weeks of purchase. Flavor is significantly deeper and meatier than oyster — worth the extra time once you have one grow under your belt.
Lion’s mane
Lion’s mane is a premium specialty mushroom with a seafood-like texture, mild flavor, and striking white pom-pom appearance. It is slightly more sensitive to humidity fluctuations than oyster but grow kits are widely available and success rates are high for beginners who maintain consistent conditions.
Button and portobello mushrooms
Button and portobello mushrooms (the same species at different maturity stages) are the most commonly eaten but the most difficult to grow at home. They require a specific composted manure substrate, careful pasteurization, and precise temperature cycling. Beginners consistently find oyster or shiitake far more rewarding for the effort involved.
What you need to start
| Product | Best for | Rating | Notes | |
|---|---|---|---|---|
| Oyster mushroom grow kit (pre-inoculated block) | Fastest and easiest route to first harvest | ★★★★★ | Most kits arrive fully colonized and fruit in 7-14 days. North Spore, Back to the Roots, and Smallhold all make reliable kits available online and in hardware stores. | Check price |
| Clear plastic bag or humidity tent | Maintaining 80-95% relative humidity during fruiting | ★★★★★ | A large clear bag from a dry cleaner works perfectly as a DIY humidity tent. Cut small slits for air exchange. No need to buy a dedicated humidity tent for a first grow. | Check price |
| Spray bottle for misting | Twice-daily humidity maintenance during fruiting | ★★★★★ | A standard spray bottle set to fine mist is all you need. Mist the inside walls of the humidity tent rather than directly on the mushroom caps to avoid bruising them. | Check price |
| Digital thermometer and hygrometer combo | Monitoring temperature and humidity levels in real time | ★★★★★ | A combo unit costs $8-12 and tells you immediately if conditions are off. Place it inside the fruiting space to get accurate readings where the mushrooms are actually growing. | Check price |
| Small USB desk fan for air exchange | Preventing CO2 buildup and stagnant-air problems | ★★★★★ | A small fan running briefly twice a day (2-3 minutes each session) prevents the CO2 buildup that causes long thin pins with underdeveloped caps. Essential for closed humidity tents. | Check price |
Total cost to start: $30–55 if you buy a grow kit plus basic supplies. Many people already own a spray bottle and a plastic bag and can start for the kit cost alone.
Step 1: Prepare your growing environment
Mushrooms do not need a grow tent, a grow light, or a dedicated room. A kitchen counter, a shelf in a spare room, or a basement corner all work — provided you can manage three variables:
Temperature: Most oyster mushroom varieties fruit best between 65–75°F. Temperatures above 80°F slow fruiting and increase contamination risk. Temperatures below 55°F stall growth but do not damage healthy mycelium — the block can be held cold and resumed when conditions improve.
Humidity: Target 80–95% relative humidity in the immediate fruiting environment. This does not mean your whole room needs to be at that level — just the air immediately around the growing block. A humidity tent handles this easily.
Light: Mushrooms do not photosynthesize and have no need for a grow light. A few hours of indirect ambient light (daylight through a window or room lighting) helps trigger pinning and orient growth direction. Avoid direct sunlight, which overheats the block surface.
Fresh air: Mushroom mycelium respires and produces CO2 constantly. In a sealed space, CO2 accumulates to levels that distort fruiting body development, producing long, thin, poorly capped mushrooms. Brief fanning twice daily is sufficient to prevent this.
Step 2: Set up your grow kit
-
Remove the block from its packaging. Most kits include a substrate block — usually straw, sawdust, or wood chips colonized with white mycelium — enclosed in a plastic bag. Handle it gently.
-
Cut an X or partially open the bag. Follow the instructions included with your specific kit. Most direct you to cut an X in the front face of the bag or peel the bag back from one end to expose a fruiting surface. This opening is where pins will emerge.
-
Soak or mist the exposed surface. Some kits recommend a 1-hour soak of the exposed face in cold water; others simply recommend thorough misting. The goal is rehydrating the outer substrate layer, which often triggers faster and denser pinning.
-
Position the block for fruiting. Set the block on a clean surface with the cut opening facing out. Elevate it slightly on a small rack or folded towel so any water drains away from the base rather than pooling underneath and creating contamination risk.
Step 3: Build your humidity tent
A humidity tent keeps the moisture levels mushrooms need without turning your whole room into a greenhouse. The simplest version costs nothing:
- Take a clear plastic bag large enough to cover the block loosely — allow roughly 2–3 inches of air space around the sides and top.
- Cut 4–6 small slits (about 1 inch each) in the sides of the bag. These slits allow CO2 to escape and fresh air to enter while retaining most of the humidity inside.
- Place the bag over the block, leaving the bottom open rather than sealing it. This allows natural convective air movement while still holding humidity near the fruiting surface.
Mist the inside walls of the bag (not the mushroom pins directly) twice daily with your spray bottle. Check with a hygrometer to confirm humidity stays above 80%. If it consistently reads below 75%, reduce the slit size or increase misting frequency.
For a more robust setup that handles multiple blocks simultaneously, a small clear mini-greenhouse shelf cover works well: view indoor mini greenhouses on Amazon.
Step 4: Watch for pins
Pins are tiny mushroom primordia — the first visible bumps emerging from the substrate surface. For oyster mushrooms, pins typically appear 5–14 days after cutting the bag, depending on variety, temperature, and kit quality.
What healthy pins look like:
- Small, firm bumps clustered tightly together on the fruiting surface
- Gray, cream, white, or yellow coloring depending on the oyster variety
- Rapid growth — pins often double in size within a single day
Warning signs during pinning:
- No pins after 14 days — try a cold shock: refrigerate the block at 40°F for 24 hours, then return it to room temperature. The temperature drop mimics natural autumn fruiting conditions and often breaks dormancy.
- Pins forming on the wrong side of the block — CO2 concentration is higher there than at the cut opening; check airflow and reposition.
- Thin, elongated pins with small caps — high CO2 from insufficient air exchange; increase fanning sessions immediately.
Step 5: Maintain conditions through fruiting
Once pins appear, oyster mushrooms grow fast — typically going from visible pins to harvest size in 4–7 days. During this period:
- Mist 2–3 times daily. As caps develop, they lose moisture faster. Increase misting frequency if caps look dry or edges begin curling inward.
- Fan for 2–3 minutes, twice daily. Remove or open the humidity tent briefly, fan the fruiting surface gently, then replace the tent. This exchange prevents CO2 buildup.
- Keep temperature stable. Avoid placing the block near a heating vent, a window with direct afternoon sun, or other sources of temperature swings.
- Do not mist open caps directly. Water sitting on open caps causes spotting and accelerates deterioration. Mist the tent walls and the substrate surface at the base, not the mushrooms themselves.
Step 6: Harvest at the right time
Harvest timing has a bigger impact on quality than most beginners expect. Oyster mushrooms are best at a precise stage just before peak maturity.
Harvest when:
- The caps are fully formed but still curved downward at the edges (concave)
- The largest cap in a cluster measures 2–5 inches across
- The edges of caps are smooth and intact with no splitting
Do not wait until:
- Cap edges flatten and begin to curl upward (convex profile)
- Light-colored powder appears on and around the caps — this is spore release
- Individual caps begin separating noticeably from the cluster
Spore release signals that mushrooms are past their quality peak. Once spores drop, texture deteriorates within hours and the fine powder can be a minor respiratory irritant in enclosed spaces.
How to harvest:
- Grasp the entire cluster at the base with your hand
- Twist gently while pulling downward — the whole cluster comes away cleanly without tools
- Alternatively, cut cleanly at the base of the cluster with a sharp, clean knife
- Remove any remaining stem stubs from the substrate surface immediately after harvest to prevent contamination before the next flush
- Rinse harvested mushrooms gently, pat dry, and use within 3–5 days or refrigerate in a paper bag
Step 7: Trigger the second flush
After the first harvest, the block is capable of producing additional flushes — typically 2–3 more for oyster mushrooms, sometimes more with good care.
Between-flush protocol:
- Remove all remaining stem stubs from the harvested surface with a clean knife or by hand — stub remnants are a contamination point
- Allow the block surface to dry slightly for 24–48 hours — a wet, stubbly surface is prone to green mold
- Submerge the entire block in cold water for 4–6 hours (place a clean plate or bowl on top to keep it fully submerged)
- Drain, return to the fruiting environment, and resume normal misting
Expect 7–14 days for the second flush to appear. Second and third flushes are typically slightly smaller than the first but still yield worthwhile harvests. Once a block stops producing pins after 2 weeks of proper care, it has exhausted its nutrients and should be composted.
Troubleshooting common mushroom growing problems
Green or black mold on the substrate — This is Trichoderma or a competing mold, almost always indicating a contaminated kit or compromised sterility. Discard the block immediately and do not attempt to cut away the mold — it spreads invisibly through the substrate. Order a replacement from a reputable supplier.
No pins after 2 weeks — Try a cold shock first: refrigerate the block at 40°F for 24 hours, then return to room temperature. If still no pins appear after another 10 days, the block may be spent or have low-quality colonization.
Small, dense clusters with no cap development — High CO2 environment. Mushrooms grow tall searching for fresh air. Increase air exchange frequency and duration: fan for longer sessions and check that tent slits are not blocked.
Dry, cracked caps or edges curling before harvest — Low humidity. Increase misting to 3–4 times daily and check for gaps in the humidity tent that are losing moisture faster than expected.
Caps turning yellow — Normal for golden oyster variety and common in other oysters when temperatures are on the higher end of the range. Not a problem unless accompanied by soft texture or off smell.
Mushrooms smelling off — Healthy mushrooms smell earthy and slightly sweet. A sour, ammonia-like, or putrid smell indicates bacterial contamination. Discard the block.
FAQ
Frequently asked questions
How long does it take to grow mushrooms indoors?
Do mushrooms need light to grow indoors?
What humidity level do mushrooms need to fruit?
Can I grow mushrooms without a grow kit?
How many harvests can I get from one grow kit?
Why are my mushrooms growing thin and tall instead of wide?
Bottom line
Growing mushrooms indoors is one of the most accessible indoor growing projects — faster than most vegetable gardens, requiring no soil, fertilizer, or grow light. An oyster mushroom grow kit delivers a reliable first harvest in under two weeks, and the core skills (humidity management, harvest timing, between-flush rehydration) transfer directly to more ambitious grows like shiitake logs or DIY substrate blocks.
The full beginner setup — grow kit, spray bottle, humidity tent, and a thermometer-hygrometer — costs $35–60 and produces enough mushrooms across multiple flushes to pay for itself several times over.
For related indoor growing projects, see the indoor gardening setup guide, how to set up a grow tent, how to grow microgreens, and best indoor grow kits for beginners.