guides
How to Set Up a Grow Tent: Step-by-Step Guide
Set up a grow tent correctly with this step-by-step guide covering tent size, lighting, ventilation, humidity, and your first grow.
 Priya Anand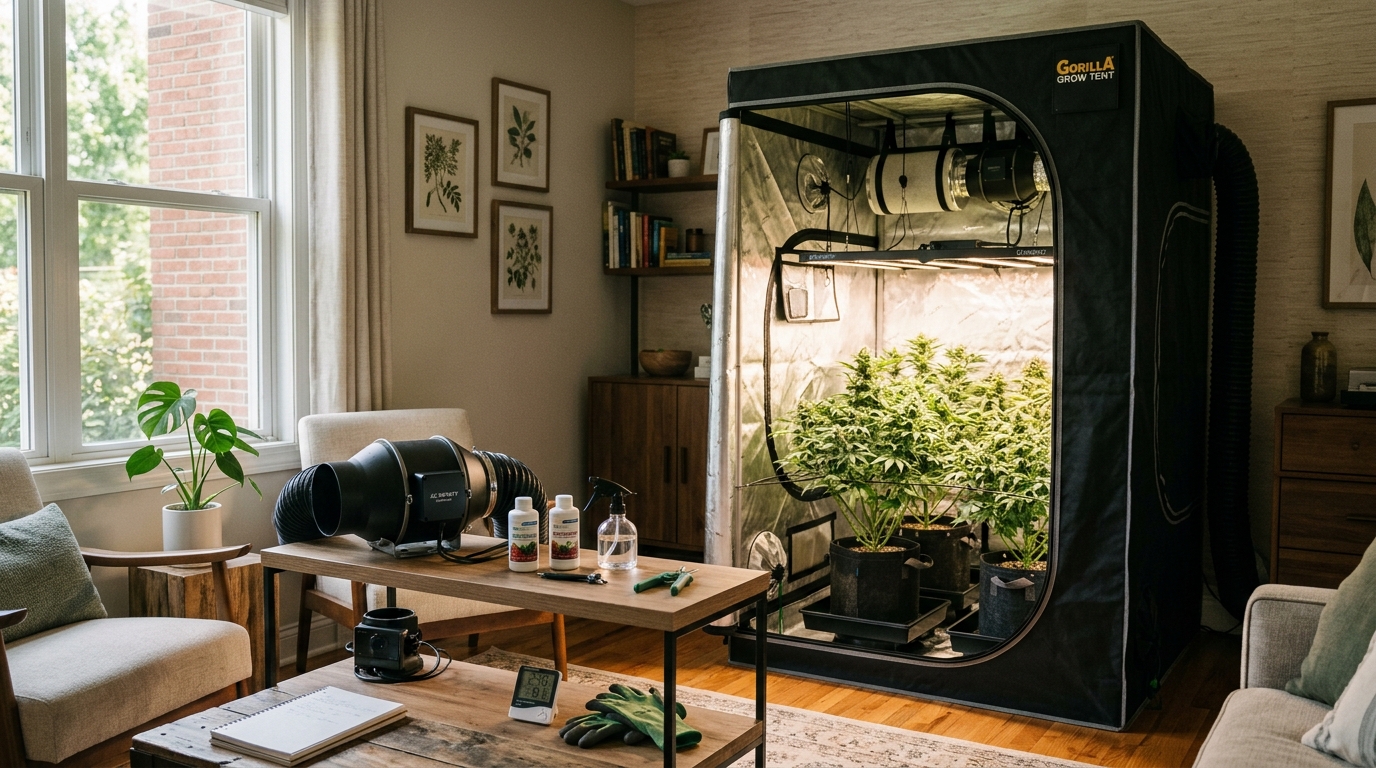
Setting up a grow tent takes about 2–3 hours from unboxing to first seedlings under light. Start with a 2×4 ft tent for most beginners — it fits two to four medium plants, accepts standard equipment, and sits in a corner without consuming a full room. The critical items are the tent itself, a matched LED grow light, and an inline fan with a carbon filter for ventilation. Get those three right and the rest is straightforward.
What size grow tent do you actually need?
Tent size determines everything else in your setup. Larger tents need more powerful lights, bigger fans, and more plants to fill efficiently. Smaller tents are easier to control but limit what you can grow.
Common tent sizes and what they suit:
| Tent Size | Footprint | Best For | Recommended Light |
|---|---|---|---|
| 2x2 ft | 4 sq ft | 1-2 plants, seedlings, clones | 100-150W LED |
| 2x4 ft | 8 sq ft | 2-4 plants, beginner full cycle | 200-250W LED |
| 3x3 ft | 9 sq ft | 3-5 plants, intermediate grower | 250-300W LED |
| 4x4 ft | 16 sq ft | 4-8 plants, dedicated grow room | 400-600W LED |
| 4x8 ft | 32 sq ft | 8-16 plants, semi-commercial | 800W+ LED |
For a first setup, the 2x4 ft tent hits a practical sweet spot. It accepts a standard 240W quantum board LED, a 4-inch inline fan system, and comfortably fits four 3-gallon pots. Total equipment cost runs $300–550 depending on light quality.
If your goal is herbs, lettuce, or small fruiting plants like peppers, a 2x2 can work with a 100W light and 4-inch fan. If you intend to grow larger plants through a full cycle, start with 2x4.
What you need: the complete equipment list
| Product | Best for | Rating | Notes | |
|---|---|---|---|---|
| Grow tent (2x4 ft) | Controlled environment for 2-4 plants | ★★★★★ | Look for 600D reflective mylar interior, metal corner connectors, and tool pouches on the frame. AC Infinity, Vivosun, and Mars Hydro all make reliable 2x4 options at $60-100. | Check price |
| Full-spectrum LED grow light (240W) | Primary light source for the tent canopy | ★★★★★ | A Samsung LM301 quantum board like the Mars Hydro TS 2000 or Spider Farmer SF-2000 covers a 2x4 veg footprint efficiently. These draw 200-240W from the wall at a fraction of the heat of older HPS lights. | Check price |
| Inline fan with carbon filter combo (4-inch) | Ventilation, odor control, and humidity management | ★★★★★ | The AC Infinity CLOUDLINE T4 or S4 is the standard recommendation for a 2x4 tent. Run the fan at speed 4-5 with the carbon filter inline for continuous air exchange every 1-2 minutes. | Check price |
| Digital thermometer-hygrometer | Monitoring temperature and humidity in real time | ★★★★★ | An Inkbird or Govee unit with min/max memory runs $10-20. Place one at canopy height and one near the floor to identify hot or cold spots in the tent. | Check price |
| Outlet timer or smart outlet | Automating the light and fan schedule | ★★★★★ | A mechanical outlet timer works fine for lights. For more control, a smart outlet or the AC Infinity UIS controller lets you program fan speeds by temperature and humidity automatically. | Check price |
| Adjustable rope ratchets (2-pack) | Hanging and adjusting grow light height | ★★★★★ | Most LED panels include these. If not, pick up a 2-pack for under $10. You will adjust light height frequently in the first few weeks as plants grow. | Check price |
Step 1: Assemble the tent frame
Grow tent frames consist of metal poles that snap or thread together, with a fabric shell that zips around the exterior. Most 2x4 tents go up in 20–30 minutes with no tools required.
Assembly sequence:
- Lay out all poles, connectors, and the fabric shell before starting
- Build the base rectangle first using the corner connectors
- Add four vertical uprights to the base corners
- Connect horizontal top rails to complete the top rectangle
- Attach any cross braces in the roof (used for hanging lights and fans)
- Slide the tent shell over the frame from the top down, aligning the zipper tracks
- Zip closed, then check that all reflective panels lie flat against the walls
Common mistakes at assembly:
- Forcing corner connectors in the wrong orientation — check the angle before pressing hard
- Leaving the tent open during assembly, which causes the shell to slip off the frame
- Over-tightening zip ties on fans and filters before confirming placement is correct
Once assembled, position the tent in its final location before loading any equipment. A full 2x4 tent with lights, fans, and plants weighs 40–70 lbs and is awkward to move.
Step 2: Install the grow light
LED quantum board panels hang from the roof cross bars using rope ratchets. The default hanging height for most 240W panels is 18–24 inches above the canopy during vegetative growth, dropped to 12–18 inches during flowering.
How to hang the light:
- Thread the carabiner end of each rope ratchet over the roof cross bar
- Attach the lower hooks to the light hanging brackets or rope holes
- Set the initial height at 24 inches above where your pots will sit
- Plug the light into your outlet timer and confirm it turns on
Light coverage check: Hold a light meter or the free Photone app on your phone at canopy height with plants at different positions in the tent. A good quantum board should deliver 400–600 µmol/m²/s (PPFD) at 24 inches — enough for robust vegetative growth. Most manufacturers include a PPFD chart for their panels.
Pull the light lower (to 18 inches) only once plants are established and you can confirm there is no light burn. Signs of too-close light include bleached white tips on new growth, upward-cupping leaves, and stunted new growth.
Step 3: Set up the inline fan and carbon filter
Proper ventilation accomplishes three things simultaneously: replaces CO2-depleted air, removes excess heat from the lights, and manages humidity. For a 2x4 tent, a 4-inch inline fan moving 200+ CFM is the standard recommendation.
The standard configuration:
Carbon filter → ducting → inline fan → ducting out of tent (through exhaust port at the top)
- Hang the carbon filter from the top cross bar using rope ratchets — filters weigh 4–8 lbs so use two hang points
- Attach a 4-inch flex duct from the filter outlet to the fan inlet
- Run a second short duct from the fan outlet to the tent exhaust port at the top
- Seal duct connections with foil tape or clamps to prevent air leaks
- Set the fan speed controller to medium (speed 4 out of 10 on AC Infinity units) to start
- Open the bottom tent passive intake ports about 30% to allow fresh air in
Fan sizing rule of thumb: Your fan should cycle the tent air volume every 1–3 minutes. A 2x4x6 ft tent holds 48 cubic feet of air, so a 4-inch fan at 200 CFM exchanges air every 15 seconds — well within spec even when accounting for filter resistance.
Temperature targets: With lights on, tent temps should stay between 70–80°F. If you see 85°F+ with the fan running, increase fan speed or check that intake ports are open.
Step 4: Monitor temperature and humidity
Place a thermometer-hygrometer at canopy height. Note the readings with lights on and lights off — the two states have different optimal ranges and you need data from both to spot problems early.
Target ranges by growth stage:
| Stage | Temperature (lights on) | Humidity |
|---|---|---|
| Seedling | 70-80°F | 65-70% RH |
| Vegetative | 70-82°F | 50-70% RH |
| Flowering | 68-80°F | 40-55% RH |
| Late flower | 65-75°F | 30-45% RH |
Solving temperature problems:
- Too hot: increase fan speed, add a small clip-on fan inside the tent for canopy airflow, check that the carbon filter is not clogged
- Too cold: reduce ventilation at night, add a small space heater outside the tent with the intake drawing warmer room air in
Solving humidity problems:
- Too humid: increase fan speed, ensure your ducting is actually exhausting air to outside the room rather than recirculating within a sealed space
- Too dry: place a small humidifier near the passive intake ports; a tray of water inside the tent can work in a pinch
A digital controller like the AC Infinity UIS Controller 67 automates fan speed based on your target temp and humidity — it eliminates the need for manual adjustments entirely.
Step 5: Set up your growing medium
Your choice of growing medium affects watering frequency, nutrient schedule, and overall complexity. Here are the three main options for a grow tent:
1. Potting soil (easiest for beginners)
Use a quality mix like Fox Farm Ocean Forest or Roots Organics in 3-gallon fabric pots for most plants, or 5-gallon pots for longer vegetation periods. Water when the top inch of soil is dry and the pot feels noticeably lighter than when freshly watered. Organic soil holds enough nutrients for the first 4–6 weeks; supplement with liquid fertilizer after that. A good organic soil option: Fox Farm Ocean Forest on Amazon.
2. Coco coir (intermediate)
Coco coir is an inert medium requiring nutrients added to every watering. It produces faster growth than soil due to better oxygen in the root zone but demands more attention. Water daily or every two days with a complete nutrient solution (such as Canna Coco A+B). Maintain pH at 5.8–6.2 for best nutrient uptake.
3. Deep water culture hydroponics (advanced)
Roots are suspended in oxygenated nutrient solution in a bucket or reservoir. This method delivers the fastest growth potential but requires the most technical knowledge. pH must stay at 5.5–6.0, and nutrient concentration must be tracked in EC or ppm. Good entry point: a 5-gallon DWC bucket with air pump and airstone.
For a first grow, soil in 3-gallon fabric pots is the most forgiving choice. Fabric pots air-prune roots to prevent circling and dry out faster than plastic, which reduces overwatering risk significantly.
Step 6: Set the light schedule with a timer
Plug your LED into the outlet timer and set the light schedule before your plants go in. Getting the schedule right from the start is easier than correcting it after seedlings are established.
Standard light schedules:
- Seedlings and clones: 18 hours on / 6 hours off
- Vegetative growth: 18 hours on / 6 hours off
- Flowering (photoperiod plants): 12 hours on / 12 hours off — this triggers flowering in light-sensitive strains
- Autoflowering plants: 18 hours on / 6 hours off throughout the entire cycle — autos flower by age, not light schedule
Set your lights-on period to match daytime hours in the room when possible. This keeps tent temperatures from spiking overnight and aligns the thermal pattern of the tent with the room.
For climate-controlled management, an outlet timer with multiple on/off settings lets you add a brief mid-day dark period (useful for reducing heat in summer) without disrupting the overall photoperiod.
Troubleshooting common grow tent setup problems
New growth looks bleached or pale The light is too close. Raise the panel by 4–6 inches and check again in 48–72 hours. Quantum boards at 240W need 18–24 inches of clearance from the canopy to distribute PPFD evenly without burning.
Tent smells despite running the carbon filter Check the connection between filter and fan. The carbon filter must receive all exhausted air before it passes through the fan — if any air bypasses the filter through duct leaks or gaps, odor escapes unfiltered. Seal all connections with foil tape and confirm the filter is fully seated in the duct collar.
Plants are stretching tall and thin toward the light The light is too far away. Lower it toward the minimum recommended distance (usually 18 inches for 240W panels). Stretching indicates the plant is reaching toward a light source that is not intense enough at that distance.
Leaves drooping and soil stays wet for several days You are watering too frequently. Lift the pot — a well-watered pot should feel noticeably heavier than a dry one. Water only when the pot feels light and the top inch of soil is dry.
High humidity overnight and condensation on tent walls Your fan is not running 24 hours a day, or the exhaust is not clearing enough air. Run the inline fan on a low setting continuously — even during the dark period — to maintain air circulation and prevent moisture buildup on walls and canopy.
FAQ
Frequently asked questions
How much does it cost to set up a grow tent?
Do I need a carbon filter in my grow tent?
What size inline fan do I need for a 2x4 grow tent?
How often should I change the carbon filter?
Can I set up a grow tent in a closet?
How do I keep my grow tent cool in summer?
Bottom line
Setting up a grow tent is a methodical process: assemble the frame, hang the light at the right height, install ventilation with a carbon filter, monitor temperature and humidity, choose a growing medium, and set an automated light schedule. Each step builds on the last, and problems are almost always traceable back to one of those six areas.
Start with a 2x4 ft tent, a 200–240W quantum board LED, and a 4-inch inline fan system. Add a digital thermometer-hygrometer so you can see what is actually happening inside the tent rather than guessing. With those pieces in place, your first grow starts on solid footing and you will have the data to fix problems when they arise.
For equipment recommendations: best grow tents, best grow lights, and best grow light timers. For a full overview of indoor growing from the beginning, see the indoor gardening setup guide.