guides
How to Grow Microgreens: A Step-by-Step Guide
Grow fresh, nutrient-dense microgreens at home in 7-14 days with no special equipment. Step-by-step guide covering seeds, trays, soil, and harvesting.
 Priya Anand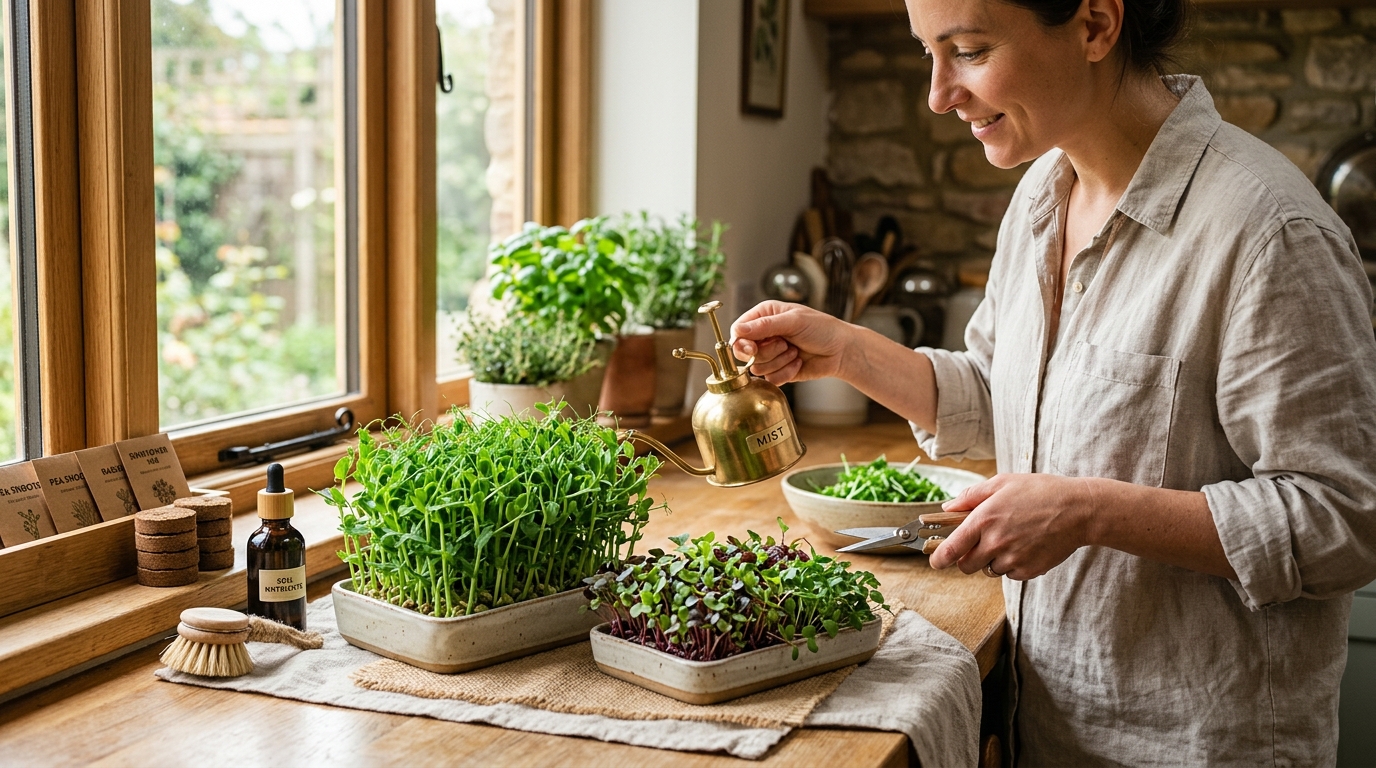
Growing microgreens at home takes 7–14 days from seed to harvest and requires nothing more than a shallow tray, potting mix, and a bright windowsill or inexpensive grow light. Radish and sunflower microgreens are the best starting varieties — both germinate reliably, grow dense, and have strong flavor that holds up in salads and sandwiches.
What are microgreens and why grow them at home?
Microgreens are vegetable and herb seedlings harvested at the cotyledon or first true-leaf stage — typically when they are 1–3 inches tall. They are not sprouts (grown in water from germination through eating) and not baby greens (older and soil-grown for longer). Microgreens sit in between: grown in a thin layer of soil or medium, harvested after the first leaves fully open.
The case for growing your own is straightforward. A clamshell of sunflower microgreens at a farmers market or grocery store costs $5–10 for a few ounces. Growing the same amount at home costs about $1–2 in seeds and medium. The flavor is better when eaten within hours of harvest, and you can grow unusual varieties — popcorn shoots, amaranth, shiso — that never appear in stores.
Nutritionally, microgreens contain concentrated amounts of vitamins C, E, and K relative to their size. But the real reason most people grow them is simpler: they taste better fresh and cost almost nothing.
What you need to start
You do not need a specialized kit. The core equipment is minimal:
| Product | Best for | Rating | Notes | |
|---|---|---|---|---|
| 10x20-inch shallow growing trays (with and without drainage holes) | Core growing container for microgreens | ★★★★★ | Buy one tray with holes (for the growing medium) and one solid tray below it to catch water. Reusable HDPE trays from Bootstrap Farmer or True Leaf Market last hundreds of grows. | Check price |
| Microgreen seeds (radish, sunflower, pea shoots) | Fast-germinating beginner-friendly varieties | ★★★★★ | Buy seeds labeled for microgreens, not standard garden seeds — microgreen seed lots are tested for high germination rates. True Leaf Market and Johnny Seeds both offer reliable selections. | Check price |
| Potting mix or coco coir for microgreens | Growing medium that drains fast and stays clean | ★★★★★ | Use 1-1.5 inches of medium per tray. Coco coir is lighter and rehydrates easily. Standard potting mix also works — avoid mixes with slow-release fertilizer pellets. | Check price |
| Spray bottle for watering | Gentle surface watering during germination | ★★★★★ | A $5-8 spray bottle is the only watering tool needed for the first few days. After the blackout phase, switch to bottom-watering by adding water to the solid tray below. | Check price |
| Full-spectrum LED grow light for seedlings | Consistent results year-round without a south window | ★★★★★ | A T5 LED panel or strip light running 12-14 hours daily works perfectly. Position it 2-4 inches above the tray canopy. Budget $25-50 for a light that covers 2-3 trays easily. | Check price |
Total startup cost for one tray: around $20–30 if you already have a spray bottle and a bright window. Add a grow light for $25–50 if your space lacks strong natural light.
Step 1: Choose the right seeds
Some microgreens are far easier to grow than others. Start with these varieties:
Best beginner microgreens:
- Radish — fastest of all; ready in 5–7 days; spicy, dense flavor; high germination rate even in cool rooms; no pre-soaking needed
- Sunflower — large seeds, easy to handle; sweet, nutty flavor; takes 10–12 days; soak seeds 8–12 hours before planting
- Pea shoots — sweet flavor; ready in 12–14 days; excellent in stir-fries and salads; soak seeds 8–12 hours before planting
- Broccoli — very small seeds; mild, slightly bitter flavor; ready in 7–10 days; no pre-soaking needed; extremely nutritious
Intermediate varieties to try after your first successful grow:
- Beet, amaranth, cabbage, kale, mustard, arugula
Avoid for your first grow:
- Basil — tiny seeds, slow germination, requires warm temperatures and higher humidity than most homes provide
- Cilantro — hulls are difficult to remove after germination and can encourage mold if left
Buy seeds specifically labeled for microgreens or sprouting, not standard garden seeds. Microgreen seed lots carry higher germination-rate testing standards. A pound of radish seeds — around $8–12 — will grow 10–15 full trays.
Step 2: Prepare your tray and growing medium
-
Set up the two-tray system. Place the tray with drainage holes inside the solid tray. This setup lets you water from the bottom after the germination phase — a technique that keeps the growing medium evenly moist without wetting the leaves or stems.
-
Add your growing medium. Fill the tray with holes to a depth of 1–1.5 inches of potting mix or coco coir. Level the surface with your hand or a flat card. The thin layer is intentional — microgreens are harvested young and do not need deep soil.
-
Pre-moisten the medium. Use a spray bottle to moisten the entire surface evenly before adding seeds. The medium should feel damp throughout — like a wrung-out sponge — but not waterlogged. Tip the tray and check that excess water drains freely into the bottom tray.
Step 3: Sow seeds at the right density
Seed density for microgreens is higher than for any other type of planting. You are not spacing seeds for individual plant growth — you are creating a dense, even carpet.
Seeding rates per 10x20-inch tray:
- Radish: 1–1.5 oz (about 4–5 tablespoons)
- Sunflower: 2–3 oz (seeds expand after soaking, so measure dry weight)
- Pea shoots: 3–4 oz (dense planting is needed for upright growth)
- Broccoli: 0.5 oz (tiny seeds; far less than you expect)
Scatter seeds evenly across the surface. Press them gently but firmly into the medium with the flat of your hand or a second tray — good seed-to-medium contact dramatically improves germination rate and reduces uneven sprouting. Do not cover seeds with soil. Microgreens need light surface contact, not burial.
Mist the seeds lightly once more after sowing, then move immediately to the blackout phase.
Step 4: The blackout phase
Cover the seeded tray immediately with an inverted empty tray, a sheet of cardboard, or a solid dome lid. This phase serves two purposes:
- Simulates soil depth — the darkness and slight pressure encourage rapid, upward stem elongation, producing taller and more tender stems
- Retains humidity — seeds need consistent moisture during germination; covering reduces evaporation dramatically
Check the tray after 2–3 days by lifting the cover briefly. If the medium surface looks dry, mist gently and replace the cover. If you see heavy condensation under the cover, prop it slightly open for 10–15 minutes to prevent mold from establishing before sealing it again.
When to remove the blackout cover:
- Radish and broccoli: after 3–4 days from sowing
- Sunflower and peas: after 4–5 days from sowing
- General rule: remove when most seeds have germinated and stems are actively pushing upward
Skipping the blackout phase produces shorter, more compact microgreens with stiffer stems. It is worth the minimal extra effort.
Step 5: Move to light and switch to bottom watering
Once the blackout phase ends, move the tray to your light source immediately. At this point, stop top-misting and shift to bottom watering exclusively.
Bottom watering technique:
- Pour about half an inch of water into the solid bottom tray
- Let the growing medium absorb water upward through the drainage holes over 20–30 minutes
- Drain any water remaining in the bottom tray after 30 minutes — do not leave the medium sitting in standing water
Check the tray daily. The medium should feel moist but not wet when pressed gently from above. In warm, dry rooms, you may need to bottom-water daily. In cooler or more humid rooms, every other day is often enough.
Why bottom watering matters: Keeping water off the leaves and stems is the single most effective way to prevent mold, which is the most common problem in microgreen growing. Surface moisture on densely planted stems in a warm room creates ideal conditions for mold within hours.
Position your grow light 2–4 inches above the tray canopy and run it 12–14 hours per day on a timer. A basic outlet timer ($10–15) handles scheduling automatically: view outlet timers on Amazon.
If using a windowsill instead, rotate the tray 180 degrees daily so both sides receive equal light and stems grow vertically rather than leaning heavily in one direction.
Step 6: Harvest at the right time
Harvest timing depends on the variety, but the general rule applies to all: harvest when the first true leaves are just beginning to emerge and the cotyledon leaves are fully open and colored. Waiting longer past this point does not meaningfully improve yield but does increase the risk of flavor becoming bitter or stems growing tough.
Visual signs of harvest readiness:
- Most stems have reached 1–2 inches in height
- Cotyledons (the first seed leaves) are fully open and vivid green or appropriate color for the variety
- You can see the beginnings of the first true leaves forming at the growing tip
- Sunflower and peas: seed hulls have mostly shed naturally from the leaves
How to harvest:
- Hold a small bundle of stems gently with one hand
- Cut cleanly just above the soil surface with sharp scissors or a clean chef’s knife
- Work across the tray in sections rather than all at once if you want a slightly staggered supply
- Rinse harvested microgreens gently in cool water and spin or pat dry before using or storing
- Store in a sealed container in the refrigerator, dry, for up to 5–7 days
Regrowth: Most microgreens do not regrow meaningfully after harvest. Pea shoots are the notable exception — cut above the lowest leaf node and pea shoots often produce a second, smaller flush 7–10 days later. For radish, sunflower, and broccoli, plan to replant after harvest rather than waiting for regrowth.
Troubleshooting common microgreen problems
Mold on the surface — the most common issue, almost always caused by top-watering leaves during the light phase or insufficient airflow. Switch to bottom-watering exclusively after the blackout phase and add a small fan nearby to increase air circulation. Use fresh medium for the next grow.
Seeds not germinating after 3–4 days — usually old seeds or a low-quality seed lot. Check the expiration date stamped on seed packets. Also confirm room temperature is adequate — radish and broccoli need at least 60°F; sunflower and peas need at least 55°F to germinate reliably.
Microgreens leaning heavily toward the light source — the light is too far away or positioned to one side. Rotate the tray 180 degrees daily or lower the grow light to 2–4 inches above the canopy.
Yellowing stems after removing the blackout cover — completely normal for the first day as chlorophyll production catches up. Stems green up within 8–12 hours of light exposure. If yellowing persists past 24 hours, increase light intensity or add more hours to your photoperiod.
Stunted, slow-growing microgreens — almost always insufficient light. Run a grow light 14 hours daily or move to the brightest available window. Plants in low light produce pale, stretched growth with less concentrated flavor.
Seeds with tough hulls still stuck to leaves — common with sunflower seeds. Mist the canopy lightly once before harvest and the hulls usually slip off naturally. Alternatively, harvest and rinse under cool running water, rubbing gently to remove remaining hulls.
FAQ
Frequently asked questions
Do microgreens need soil or can they grow without it?
How much light do microgreens need each day?
Why are my microgreens growing mold?
Can I reuse the growing medium after harvest?
What is the fastest microgreen to grow?
How much do microgreens produce per tray?
Bottom line
Growing microgreens is one of the fastest and most rewarding indoor growing projects available. A single tray produces a harvest in under two weeks, costs $1–3 in materials, and delivers results no grocery store can match for freshness. Start with radish for a quick win, add sunflower and pea shoots once the process feels routine, and stagger plantings every 5–7 days to keep a continuous supply going.
The full setup — trays, seeds, coco coir, spray bottle, and grow light — runs $40–70 and pays for itself within the first few harvests.
For more indoor growing projects, see the indoor gardening setup guide, how to set up a grow tent, best grow lights, and best microgreens kits.