roundups
Best Microgreens Kits 2026 (From First Tray to Serious Setup)
Top microgreens growing kits compared: trays, seed mats, automated systems. Honest picks for beginners, value buyers, and serious growers.
 Priya Anand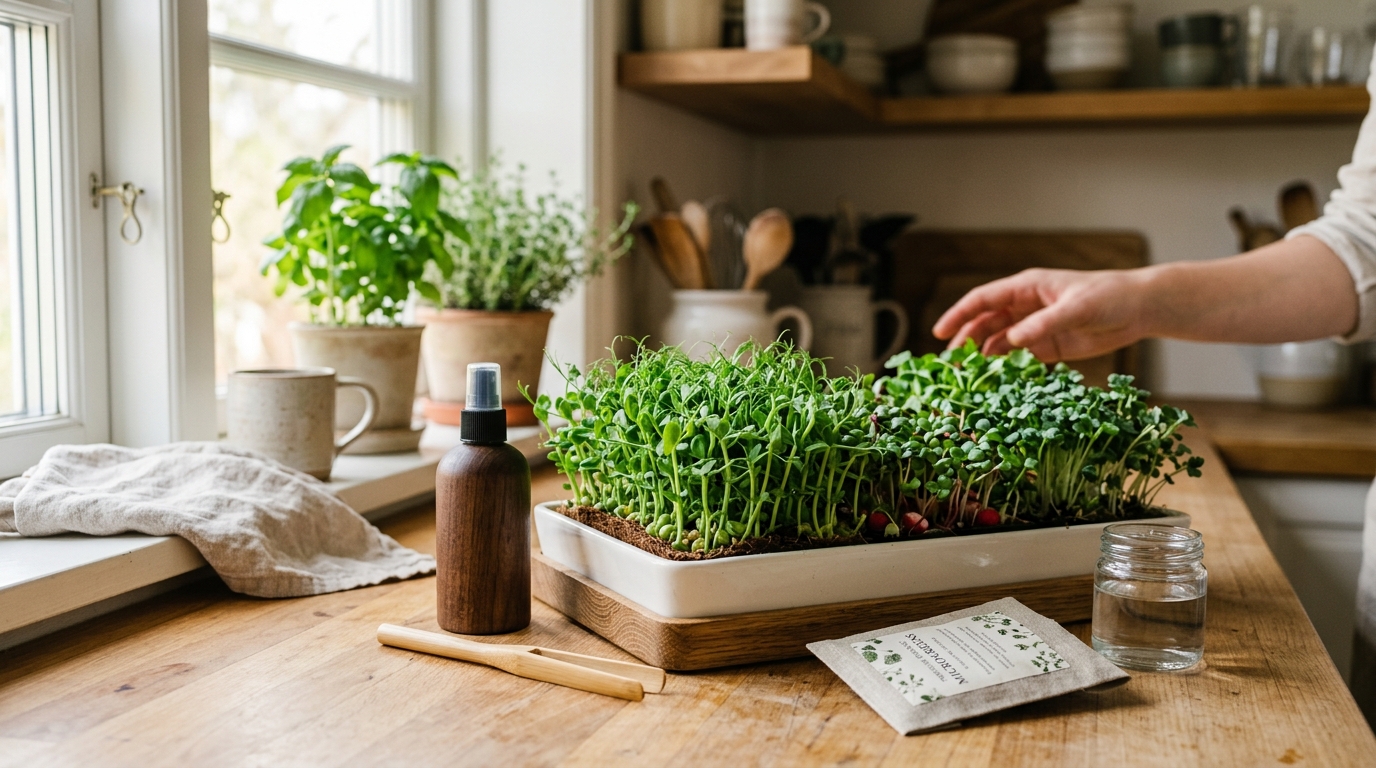
Microgreens are the fastest turnaround in indoor gardening: radishes and broccoli go from seed to harvest in 7 days, sunflowers and peas in 10-12. The actual kit you need to start is extremely simple — a 10×20 growing tray, a substrate (hemp mat or coco coir), seeds, and darkness for germination. Most beginner kits bundle this for $25-40, which is the right starting price. The $55-80 automated seed-quilt systems (Hamama being the most popular) are genuinely easier, with a trade-off: they lock you into proprietary seed refills at a higher per-crop cost.
This guide covers the real options across tray-based kits, automated systems, and the DIY-from-scratch approach — with honest framing on when each makes sense and what to buy first.
How microgreens kits differ
Three categories cover the entire market:
1. Basic tray kits. A 10×20 tray with drainage holes, a solid tray underneath, a substrate (jute mat or coco coir), and seeds. This is the standard home-growing approach. You wet the mat, spread seeds, press them down, cover with the solid tray for germination, uncover when the seeds sprout, and harvest in 7-12 days. Cost is low ($15-40 for the kit), and trays are reusable indefinitely. The seed and mat cost per tray runs $2-6 depending on variety and substrate.
2. Automated seed-quilt systems (Hamama). A countertop unit with a water reservoir. You drop in a pre-seeded quilt (proprietary), fill the reservoir, and the system wicks water up into the mat. No soil measuring, no blackout required — the quilt handles germination. The appeal: the learning curve essentially disappears. Cost: $55-80 for the starter kit, plus $12-18 per seed-quilt refill.
3. Professional 1020 tray setups. Bootstrap Farmer and similar pro-grade trays are used by microgreens farmers producing pounds of greens per week. Sturdier plastic, consistently flat bottoms, designed for stacking weight during germination (important for sunflowers and peas, which need downward pressure to push through the hull). Overkill for one-tray hobbyists; exactly right if you plan to grow 4+ trays weekly or want trays that last a decade.
Quick comparison
| Product | Best for | Rating | Notes | |
|---|---|---|---|---|
| Hamama Microgreens Growing Kit | beginners wanting the most automated experience | ★★★★☆ | $55-75. Pre-seeded quilts, water reservoir, no soil. Lowest learning curve. | Check price |
| Bootstrap Farmer 1020 Tray Set | serious growers; best quality trays available | ★★★★★ | $30-50 for a set of 10. Heavy-duty, stackable. Lasts years of weekly use. | Check price |
| True Leaf Market Microgreens Starter Kit | best beginner bundle with quality organic seeds | ★★★★★ | $30-45. Includes trays, jute mats, and organic seeds. Best total value. | Check price |
| iPower 10x20 Seedling Tray (10-pack) | budget tray-only purchase; DIY approach | ★★★★☆ | $15-25 for 10-pack. Standard trays; no seeds included. | Check price |
| Vivosun Seed Sprouter Tray | budget divided trays; good for testing multiple varieties | ★★★★☆ | $12-20. Smaller divided trays. Low cost entry point. | Check price |
The picks
Best for beginners: Hamama Microgreens Growing Kit
Best for first-time growers who want a no-soil, no-measuring, genuinely hands-off microgreens system
Hamama Microgreens Growing Kit
Hamama is the most beginner-friendly microgreens kit on the market. The system uses pre-seeded 'quilts' — fabric mats pre-loaded with seeds and covered with a biodegradable germination lid. Drop the quilt into the water tray, fill the reservoir, and the mat wicks moisture upward to germinate seeds. No darkness required, no soil measuring, no guessing whether seeds have germinated underneath a tray. Within 7-10 days you have dense, harvest-ready greens. The kit runs $55-75 for the starter (unit + 4 seed quilts); refill quilts are $12-18 each depending on variety. For the user who wants fresh microgreens without any learning curve, Hamama is the right call.
★★★★☆ 4.4 · 1,200 reviews
Check current price on Amazon→Pros
- No soil, no measuring, no setup complexity — drop quilt in, add water, harvest in 7-10 days
- No dedicated dark germination period required — quilt handles moisture and light blocking
- Clean countertop footprint; looks intentional in a kitchen rather than a science experiment
- Consistent results run to run — little variation batch to batch once established
- Seed quilt variety selection covers radish, broccoli, sunflower, pea shoots, and multi-variety blends
Cons
- Proprietary seed quilts cost $12-18 per crop — significantly more than bulk seeds from a reputable supplier
- Limited to Hamama's quilt variety catalog; no custom seed blending
- Long-term cost adds up: 12 crops per year at $15 each = $180/year vs $15-30/year for bulk-seed tray growers
- The unit cannot accept standard seeds without workarounds — you're committed to the quilt ecosystem
Best overall value: True Leaf Market Microgreens Starter Kit
Best for beginners who want the most complete, best-value bundle with quality seeds already included
True Leaf Market Organic Microgreens Starter Kit
True Leaf Market is a legitimate seed company with a strong reputation in the microgreens community — their seeds are purpose-grown for microgreens (high germination rates, appropriate seeding density, correct variety selection). Their starter kit bundles 10×20 growing trays with and without drainage holes, pre-cut jute growing mats, and a selection of organic microgreens seeds — typically radish, broccoli, peas, and a salad blend. At $30-45 it costs less than Hamama and produces higher-quality, more varied greens because you're using dedicated microgreens seed varieties. The trade-off versus Hamama: slightly more involved — you soak seeds, spread them, cover for blackout — but the kit includes clear instructions and the whole process takes 15-20 minutes of active time per crop, spread over a week.
★★★★★ 4.6 · 2,800 reviews
Check current price on Amazon→Pros
- Includes quality organic seeds: radish, broccoli, peas, and a salad blend
- Jute mats pre-cut to fit 10×20 trays — no measuring or cutting substrate
- Trays are reusable for years; mats are the only ongoing consumable
- Cheaper ongoing cost: bulk seed bags from True Leaf run $8-15 per variety with enough seed for 50+ crops
- True Leaf's seeds have high germination rates specifically tested for microgreens
Cons
- More steps than Hamama: soak seeds, spread on mat, cover for blackout, uncover at sprout stage
- Requires a dark location for germination — a closet, cabinet, or second tray flipped on top works fine
- Trays included are mid-grade — serious weekly growers often upgrade to Bootstrap Farmer trays after 6-12 months
Best for serious growers: Bootstrap Farmer 1020 Tray Set
Best for growers running 4+ trays weekly; the professional-grade tray used by small-scale microgreens farmers
Bootstrap Farmer 1020 Microgreens Tray Set (with holes + solid)
Bootstrap Farmer makes the best 1020 trays available for home and small-farm microgreens production. The difference versus standard garden trays is immediately noticeable: thicker plastic, a consistently flat bottom (no bowing that causes dry spots or pooling), and a build that handles stacking weight without flexing — critical for sunflowers and peas, which need 2-5 lbs of pressure during germination to push through the seed hull. A set of 10 trays (5 with holes, 5 solid) runs $30-50 and holds up to weekly use for 5-10 years without warping. Bootstrap Farmer also sells germination mats, coco coir blocks, and seeds. If you're growing microgreens every week or thinking about producing for sale, these are the trays to buy once and stop thinking about.
★★★★★ 4.8 · 900 reviews
Check current price on Amazon→Pros
- Noticeably thicker plastic than standard garden or grow trays — handles stacking weight without warping
- Consistently flat bottom prevents dry spots and uneven watering across the mat
- Designed specifically for microgreens production (hole spacing, stacking compatibility, tray depth)
- Buy once, last 5-10 years at weekly growing frequency
- Bootstrap Farmer is a legitimate microgreens resource with guides, seed sourcing, and growing supplies
Cons
- Higher per-tray cost than generic 1020 trays ($3-5 vs $1-2 per tray)
- Overkill for growers doing one tray per month as a casual hobby
- No seeds or substrate included — you source separately
Best budget entry: iPower 10×20 Seedling Trays
For growers who want to test microgreens before committing, a 10-pack of standard 1020 trays from iPower or Vivosun runs $15-25. These are thinner plastic than Bootstrap Farmer, not as flat or sturdy under stacking weight, but they work for testing. Pair with jute mats ($10-15 for a roll) and seeds from True Leaf Market and you have a complete setup for $40-50 total.
The honest trade-off: generic trays bow and warp over time (noticeable within 6-18 months at weekly use), and the inconsistent bottom creates dry spots in the corners. For hobbyist use at monthly growing frequency, this isn’t a meaningful problem — the trays last long enough.
What to skip
1. Random Amazon microgreens seed bags. Microgreens need high germination rates because you seed densely — a 60% germination rate produces a patchy, sparse crop. Reputable suppliers (True Leaf Market, Johnny’s Selected Seeds, Mumm’s Sprouting Seeds, West Coast Seeds) test and breed for microgreens specifically. Unknown Amazon bags are often off-brand garden seed inventory that hasn’t been tested for microgreens seeding density.
2. Kits using standard potting soil or heavy mix. Microgreens are harvested before roots establish, so deep soil is pointless and creates unnecessary mess. Coco coir, peat-based germination mix, or jute mats drain better, weigh less, and work identically for crops harvested in 7-12 days. Any kit requiring you to fill trays with standard potting soil is optimized for the wrong grow length.
3. “Complete” kits priced above $80. After your first crop, you replace seeds and mats separately — the bundled convenience is a one-time benefit. A quality kit is $25-45. Above $80 you’re paying for packaging.
4. Sprouting jars marketed as microgreens kits. Sprouts (alfalfa, mung bean, clover) are grown in jars in 3-5 days and eaten root-and-all. Microgreens grow on trays in 7-12 days and are cut above the root. They’re different products and use different equipment. A sprouting jar is not a microgreens kit — the confusion is common in Amazon listings.
FAQ
Frequently asked questions
What's the easiest microgreen variety to start with?
Do I need a grow light for microgreens?
How much does it cost to grow microgreens vs buying them?
How long do microgreens last after harvest?
Can I reuse microgreens trays and mats?
How many trays do I need to grow microgreens consistently?
Hamama vs a regular tray kit — which should I start with?
Bottom line
Best for beginners: Hamama Microgreens Kit — the most hands-off system with the lowest failure rate for first-timers. Best overall value: True Leaf Market Microgreens Starter Kit — best seed quality in a complete beginner bundle. Best for serious growers: Bootstrap Farmer 1020 Tray Set — the professional-grade tray that won’t need replacing.
Start with radishes or broccoli for your first crop. After one successful harvest, branch out to sunflowers, peas, and arugula.
Once you’re hooked, the natural next steps are grow lights for better post-germination coverage, hydroponic systems for longer-cycle crops, or seed starting kits to extend your indoor growing into full vegetable starts.