guides
How to Set Up a Drip System for Hydroponics
Build a top-feed drip hydroponics system from scratch. Covers reservoir setup, drip manifold, growing medium, nutrients, and the best starter kits.
 Priya Anand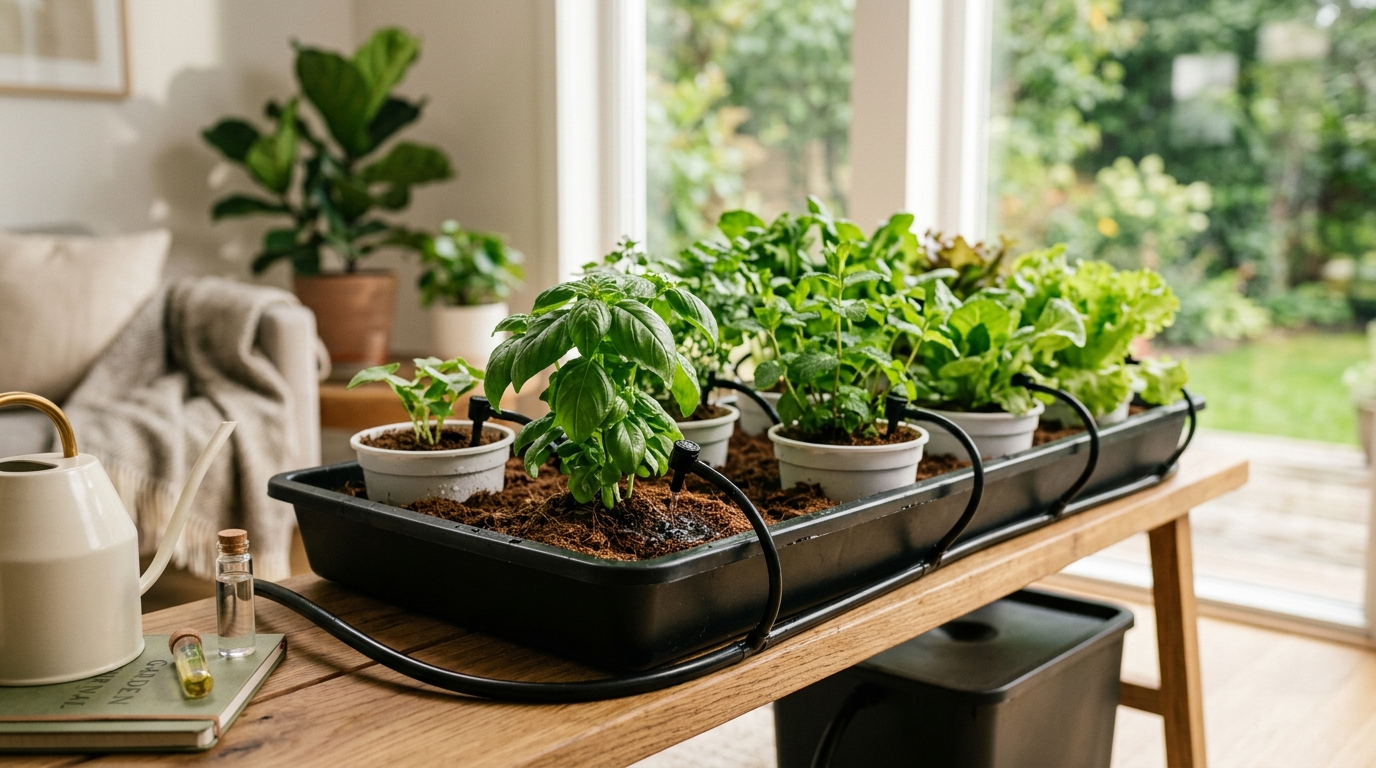
A recirculating drip hydroponics system uses a submersible pump on a timer to deliver nutrient solution through drip emitters directly to the base of each plant, then collects and returns excess solution to the reservoir for reuse. For most home growers, a 5 to 10 gallon reservoir, a 185 GPH pump, a digital cycle timer, and clay pebbles as growing medium is the complete hardware list.
What is a drip hydroponics system?
A drip system is one of the six main hydroponic growing methods and one of the most widely used commercially. A submersible pump sits in a nutrient reservoir and is connected by tubing to a manifold — a network of distribution lines that branches out to individual drip emitters positioned at the base of each plant. When the pump timer activates, nutrient solution flows through the emitters and drips slowly onto the growing medium at each plant site, saturating the root zone before draining back into the reservoir through collection holes at the bottom of each container.
The key distinction from passive methods like wick systems or Kratky is that a drip system actively delivers nutrients on a schedule rather than relying on capillary action or static reservoirs. This active delivery allows drip systems to support larger, faster-growing plants with higher nutrient demands — tomatoes, peppers, cucumbers, and fruiting herbs that would starve or wilt in a passive setup.
Two types of drip systems:
Recirculating (recovery) drip: Excess nutrient solution drains from the containers back into the reservoir through return lines. The reservoir volume stays consistent and nutrients are used efficiently. pH and EC fluctuate as plants feed and as water evaporates, so they require daily monitoring. This is the standard choice for home growing.
Run-to-waste drip: Excess solution drains away from the containers and is discarded rather than returned to the reservoir. pH and EC stay more stable because the reservoir is not being depleted and replenished continuously. The tradeoff is higher water and nutrient consumption. Run-to-waste is more common in large commercial operations where nutrient waste is acceptable but pH monitoring labor is not.
What you need to build a drip system
| Product | Best for | Rating | Notes | |
|---|---|---|---|---|
| Nutrient reservoir (5 to 20 gallon) | Holding nutrient solution and housing the submersible pump | ★★★★★ | Use a dark, food-safe container — a 5-gallon bucket for 1 to 2 plants, a 10-gallon tote for 3 to 4 plants, or a 17 to 20-gallon tote for 5 to 8 plants. The reservoir must be dark to block light and prevent algae. Opaque storage totes with lids work well and cost under $15 at hardware stores. | Check price |
| Submersible water pump (150 to 400 GPH) | Pushing nutrient solution from reservoir to drip emitters | ★★★★★ | Pump flow rate in gallons per hour (GPH) should exceed the total drip output for all plants with headroom to spare. For 4 plants at 30 GPH each, a 185 GPH pump with adjustable flow provides enough pressure at the emitters. Look for a pump rated for continuous submersible use with a flow adjuster so you can dial back pressure if emitters drip too fast. | Check price |
| Digital cycle timer | Scheduling pump on and off cycles throughout the day | ★★★★★ | A standard 24-hour outlet timer cannot run multiple short cycles per day — you need a digital cycle timer with customizable on and off intervals, often labeled as a repeat cycle timer. Set it to 15 minutes on and 2.5 hours off for a 4-cycle-per-day feeding schedule. The VIVOSUN and BN-LINK timers are widely used and reliable for drip systems. | Check price |
| Drip manifold kit with tubing and emitters | Distributing nutrient solution from the pump to each plant | ★★★★★ | A drip manifold kit includes a main distribution line (typically half-inch tubing), branch lines (quarter-inch tubing), and adjustable drip emitters rated at 0.5 to 2 gallons per hour. Adjustable emitters let you tune flow rate per plant individually. Pre-made manifold kits for 4 to 8 sites cost $15 to $30 and include all needed fittings. | Check price |
| Grow containers (net pots or buckets with lids) | Holding growing medium and plant roots above the drain layer | ★★★★★ | Five-gallon buckets with 6-inch net pot lids are the most common drip system containers for medium to large plants. For smaller herbs and greens, 1 to 2 gallon containers or 6-inch net pots in a tray setup work well. Each container needs a drain hole at the bottom for recirculating systems — connect return tubing or allow gravity drainage back to the reservoir. | Check price |
| pH meter and EC/TDS meter | Monitoring and maintaining nutrient solution quality daily | ★★★★★ | Active recirculating drip systems require daily pH and EC checks because plant feeding and evaporation shift both values continuously. A digital pH pen accurate to 0.01 pH units and a separate EC/TDS meter give the readings needed to adjust. Combo pH/EC meters are convenient but require more frequent calibration to maintain accuracy across both measurements. | Check price |
Step 1: Set up the reservoir and pump
The reservoir is the heart of the drip system. Everything else connects to it, and its volume determines how long you can go between nutrient changes.
Reservoir sizing by plant count:
- 1 to 2 plants: 5-gallon reservoir
- 3 to 4 plants: 10-gallon reservoir
- 5 to 8 plants: 17 to 20-gallon reservoir
Reservoir setup:
- Clean the reservoir with dish soap and rinse thoroughly before first use
- Drill or cut an access hole in the lid for the pump power cord and the return line from the growing containers
- Place the submersible pump on the floor of the reservoir — do not suspend it mid-water, as it needs to sit near the bottom to prime efficiently
- Run the main pump outlet tubing through a hole in the reservoir lid and up toward the grow containers
- Attach a ball valve or flow adjuster to the main line — this lets you reduce pump output without running the pump at full pressure, which extends pump life
Testing the pump before adding nutrients: Fill the reservoir with plain water, submerge the pump fully, plug it in, and let it run for 10 minutes. Check for any leaks at the tubing connections, and confirm that the pump flow is strong enough to push solution up to the height of your grow containers. If you are mounting the containers on a shelf above the reservoir, measure the vertical lift and confirm the pump is rated for that head height.
Step 2: Build and route the drip manifold
The manifold distributes nutrient solution evenly to each plant site. Uneven flow between plants causes some to overfeed and others to underfeed, which shows up as inconsistent growth rates within days of startup.
Building the manifold:
- Connect the main half-inch distribution line to the pump outlet and route it above the level of all growing containers
- Insert quarter-inch barbed tees into the main line at intervals corresponding to each plant site — space them evenly
- Run a quarter-inch branch line from each tee down to the container, then insert an adjustable drip emitter at the end of each branch line
- Position each drip emitter so it points at the base of where the plant stem will sit, roughly 1 to 2 inches above the growing medium surface
- Plug the end of the main distribution line with a threaded cap or end plug to build pressure in the system
Balancing emitter flow: With the pump running, check each emitter for a steady drip — not a stream and not a sporadic trickle. Adjustable emitters have a turn-screw on top: open to increase flow, close to reduce. Aim for a drip rate of 1 to 2 gallons per hour per plant for most medium-sized plants. Larger plants like tomatoes can support 2 to 3 gallons per hour at peak fruiting.
Best for Building a custom drip manifold for 4 to 8 plant sites
Rainbird 1/4 Inch Drip Irrigation Emitter Kit
Industry-standard adjustable emitters with barbed fittings designed to thread directly into quarter-inch distribution tubing. Each emitter adjusts from 0 to 2 gallons per hour independently, so you can tune flow per plant as the grow progresses. UV-resistant fittings hold up under grow lights without cracking.
★★★★★ 4.6 · 3,200 reviews
Check current price on Amazon→Step 3: Fill containers with growing medium
Clay pebbles (also sold as hydroton or LECA — lightweight expanded clay aggregate) are the standard growing medium for drip systems. They drain completely between feed cycles, hold just enough moisture to sustain roots between cycles, and support large root masses without compacting.
Preparing clay pebbles:
- Rinse clay pebbles thoroughly in a colander under running water until the water runs clear — manufacturing dust on new pebbles can clog drip emitters
- Soak the rinsed pebbles in a bucket of pH-adjusted water (pH 5.8 to 6.2) for 8 to 12 hours — this pre-conditions them and removes remaining fine particles
- Drain and place directly into containers — no drying time needed
Filling the containers:
- Add a layer of 2 to 3 inches of clay pebbles to the bottom of the container
- Place the root ball of the transplant in the center at the appropriate depth for the plant variety
- Fill in around the root ball with pebbles, tamping gently to keep the plant upright but not compressing the roots
- Leave 1 to 2 inches of headspace at the top of the container so drip solution does not splash over the rim
For seedlings and clones: Clay pebbles can be too coarse to support seedlings smaller than 3 inches tall. Start seedlings in 1-inch rock wool cubes or a seedling plug, then transplant to the clay pebble containers once the stem is 3 to 4 inches above the growing medium and roots are visible at the cube bottom.
Best for Growing medium for drip system containers and net pots
Mother Earth HydroOrganics Hydroton Clay Pebbles 10 Liter
Pre-rinsed expanded clay pebbles with a uniform size of 8 to 16mm — large enough to drain freely between feed cycles but small enough to support plant stems without shifting. pH neutral, reusable after sterilizing between grows, and compatible with all nutrient systems.
★★★★★ 4.7 · 5,800 reviews
Check current price on Amazon→Step 4: Mix and add the nutrient solution
Drip systems are active and nutrient-intensive relative to passive methods. The reservoir requires a full-strength nutrient solution from day one of vegetative growth, adjusted upward as plants mature.
Recommended EC targets by growth stage:
| Growth Stage | EC Target | pH Range |
|---|---|---|
| Seedling (week 1 to 2) | 0.8 to 1.2 mS/cm | 5.8 to 6.2 |
| Early vegetative (week 2 to 4) | 1.2 to 1.8 mS/cm | 5.8 to 6.2 |
| Late vegetative (week 4 to 6) | 1.8 to 2.2 mS/cm | 5.5 to 6.0 |
| Early flowering/fruiting | 2.0 to 2.5 mS/cm | 5.5 to 6.0 |
| Peak fruiting | 2.2 to 2.8 mS/cm | 5.5 to 6.0 |
| Herbs and leafy greens (all stages) | 1.4 to 2.0 mS/cm | 5.8 to 6.2 |
Mixing procedure:
- Start with room-temperature water in a clean bucket
- Add Part A nutrient concentrate first, stir until fully incorporated
- Add Part B, then any additional supplements — always add nutrients to water, never the reverse
- Test EC and dilute further or add more concentrate to reach the target range
- Test pH and adjust to target with pH Up or pH Down — add a few drops at a time, stir, and retest after each adjustment
- Pour into the reservoir and attach the lid
Best for Complete nutrient solution for drip system vegetables and herbs
General Hydroponics Flora Series 3-Part Nutrients
The benchmark 3-part liquid nutrient system used by commercial growers worldwide. FloraMicro, FloraGro, and FloraBloom mix in different ratios depending on growth stage, giving precise control over vegetative and fruiting nutrition that single-part nutrients cannot match. Formulated to stay in solution without settling, which prevents drip emitter clogging.
★★★★★ 4.8 · 18,400 reviews
Check current price on Amazon→Step 5: Set the timer and run a test cycle
The pump timer determines how frequently plants receive nutrient solution. Getting cycle frequency right from the start prevents both underwatering (roots dry out between cycles) and overwatering (root zone stays saturated, reducing oxygen and causing rot).
Starting timer settings by growing medium:
- Clay pebbles (fast-draining): 4 to 6 cycles per day, 15 to 20 minutes each
- Coco coir in drip containers: 3 to 4 cycles per day, 20 to 30 minutes each
- Rock wool slabs: 5 to 8 cycles per day, 10 to 15 minutes each
The goal is to wet the growing medium fully in each cycle while allowing it to partially dry — not bone-dry, but not waterlogged — before the next cycle. Lift the container and check weight difference before and after a feed cycle to gauge how much solution the medium is retaining.
Running the first test cycle:
- With the reservoir full of plain water, activate the timer manually or plug the pump in directly
- Watch each drip emitter confirm that all are flowing — a blocked emitter usually indicates a manufacturing defect or debris from the clay pebbles
- Check return lines and drainage holes for proper flow back to the reservoir
- Verify that no standing water pools on the surface of the growing medium — surface pooling means the drain rate is slower than the feed rate and emitter flow should be reduced
Best plants for a drip hydroponics system
The drip system is the most versatile active hydroponic method and can support virtually any crop. Plants that would exhaust a wick system or Kratky system in weeks grow reliably to full size in a drip setup.
| Crop | Container Size | EC Target | Typical Yield Cycle |
|---|---|---|---|
| Tomatoes (indeterminate) | 5-gallon bucket | 2.0 to 2.8 mS/cm | 70 to 90 days from transplant |
| Peppers | 3 to 5 gallon | 2.0 to 2.5 mS/cm | 60 to 80 days from transplant |
| Cucumbers | 5-gallon bucket | 1.8 to 2.4 mS/cm | 50 to 70 days from transplant |
| Basil | 1 to 2 gallon | 1.4 to 2.0 mS/cm | 28 to 35 days from transplant |
| Lettuce | 1 to 2 gallon | 1.2 to 1.8 mS/cm | 30 to 40 days from transplant |
| Kale | 2 to 3 gallon | 1.6 to 2.2 mS/cm | 35 to 50 days from transplant |
| Strawberries | 2 to 3 gallon | 1.8 to 2.4 mS/cm | 60 to 90 days from transplant |
What to skip in a drip system
Very small, slow-growing plants — small succulents, compact cacti, and single-stem herbs like thyme in small containers — are better suited to passive systems. The drip system overhead (reservoir management, daily pH checks, pump maintenance) is not worth it for a plant that needs feeding once a week. For compact herb gardens of 2 to 4 plants, a wick system or Kratky setup delivers comparable results with a fraction of the maintenance.
Strawberries, which push the limits of a wick system, are excellent drip system candidates — the active feeding matches their fruiting-stage nutrient demand reliably.
Maintaining your drip system
Daily (active growing season):
- Check reservoir solution level and top off with pH-adjusted water as needed
- Measure EC and pH — add nutrients if EC drops more than 0.3 mS/cm from target, adjust pH if outside range
Weekly:
- Inspect drip emitters for clogs — a clogged emitter means one plant is not feeding and will show stress within 2 to 3 days
- Check pump filter screen (if present) and rinse if covered in mineral deposits
- Flush return lines briefly with plain water to clear any salt accumulation
Every 2 to 3 weeks:
- Complete reservoir swap: drain fully, rinse reservoir walls with a dilute hydrogen peroxide solution (3 percent, mixed 1:5 with water), then refill with fresh nutrient solution mixed to the current stage EC target
- Inspect tubing and manifold fittings for cracks or loose connections
Between grows:
- Rinse clay pebbles in dilute hydrogen peroxide solution, then soak in pH-adjusted plain water for 24 hours before reuse
- Soak the entire drip manifold in the same solution to sterilize emitters and tubing
Troubleshooting common drip system problems
Plants wilting despite full reservoir: One or more drip emitters may be clogged. Remove each emitter and flush with a needle or syringe. If the pump is running but no solution reaches the canopy, check for a kinked or collapsed distribution line.
Yellow lower leaves and slow growth: EC is too low for the current growth stage. Measure EC and increase concentrate to bring it to the target range. In a recirculating system where plants have fed heavily, the EC can drop significantly within 48 hours during peak growth — increase reservoir volume or check EC more frequently.
Algae growth in the reservoir: Light is penetrating the reservoir or return lines. Wrap any clear lines with black tape, and ensure the reservoir lid seals completely with no gaps around tubing entry points. Drain the reservoir, clean with hydrogen peroxide solution, and refill.
Root rot (brown, slimy roots): The feed cycle is too frequent or too long for the current plant size and growing medium. Reduce cycle frequency by one cycle per day and check drain rate. Healthy roots in clay pebbles should be white to cream-colored with visible root hairs.
FAQ
Frequently asked questions
What is the difference between a drip system and deep water culture?
How often should I change the nutrient solution in a recirculating drip system?
Can I use coco coir instead of clay pebbles in a drip system?
How do I keep drip emitters from clogging?
What size pump do I need for a drip system?
Do drip systems work for growing herbs?
Bottom line
A drip system is the most capable and scalable hydroponic method for home growers who want to grow large plants — tomatoes, peppers, cucumbers — or run a multi-site setup beyond what passive methods can support. The tradeoff is real: daily pH and EC checks, pump and timer management, and periodic reservoir changes require consistent attention that a wick or Kratky system does not. For growers who want to set up and leave a system alone for days at a time, start passive. For growers ready to commit to a daily 5-minute check in exchange for significantly faster growth and heavier yields, a recirculating drip system is the right choice.
The fundamentals that determine success: drain-to-waste between cycles so roots get oxygen, maintain pH at 5.5 to 6.2 at all times, and scale EC up in steps as plants mature rather than starting at fruiting-stage concentrations from week one.
For more on active and passive hydroponics: wick system for hydroponics, how to set up a Kratky system, best hydroponic systems, best hydroponic nutrients, and how to prevent root rot in hydroponics.