guides
DIY Hydroponics Guide: Build Your First System
Build a DIY hydroponics system from scratch with this step-by-step guide covering system types, equipment, nutrient mixing, and plant care.
 Priya Anand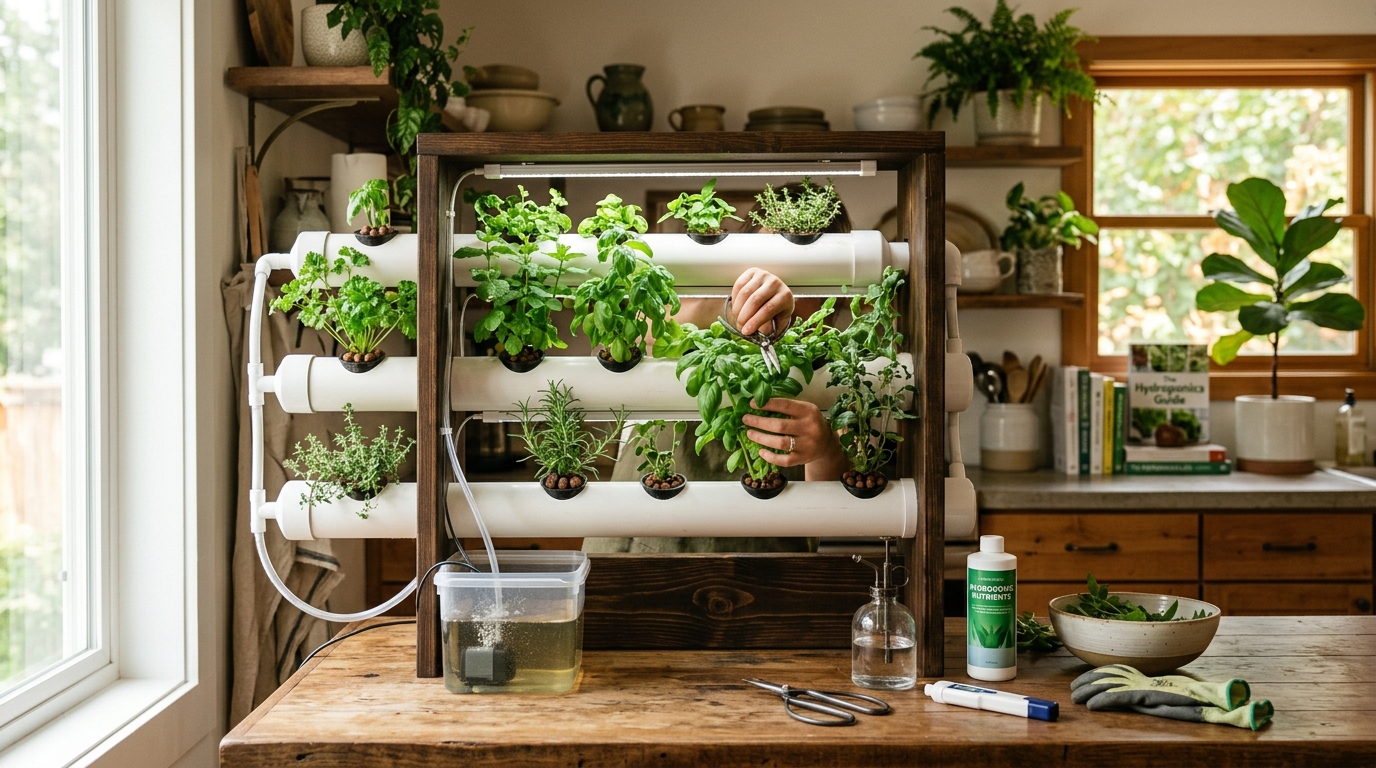
The easiest DIY hydroponics system for beginners is a deep water culture (DWC) bucket — a 5-gallon bucket, a net pot lid, an air pump with an airstone, and a basic nutrient solution. You can build one for under $50 and have leafy greens growing in two weeks. Deep water culture is the starting point; nutrient film technique (NFT) and ebb-and-flow are better once you have one successful cycle behind you.
Which DIY hydroponic system is right for you?
Before you build anything, pick the system type that matches your space, budget, and time commitment. The four common DIY options each have different complexity levels.
| Product | Best for | Rating | Notes | |
|---|---|---|---|---|
| Deep Water Culture (DWC) | Beginners and small spaces | ★★★★★ | Roots hang in oxygenated nutrient solution in a reservoir. Simple to build, easy to monitor, and very forgiving. A 5-gallon bucket grows 1 large plant or 4 small plants in net pots. | Check price |
| Kratky Method | Passive growing with no electricity for the reservoir | ★★★★★ | A passive variant of DWC with no air pump. Plants are suspended above a static nutrient solution and draw nutrients as roots grow down. Works beautifully for lettuce and herbs, fails for heavy feeders. | Check price |
| Nutrient Film Technique (NFT) | Growing large quantities of leafy greens | ★★★★☆ | A thin film of nutrient solution flows continuously through sloped channels past suspended roots. More efficient for mass production but requires a pump, timer, and sloped channels that are harder to DIY well. | Check price |
| Ebb and Flow (Flood and Drain) | Versatile medium-level growers | ★★★★☆ | A tray floods with nutrient solution on a timer and drains back to a reservoir. Supports many plant types and growing mediums. More parts to fail than DWC but very adaptable. | Check price |
Start with DWC or Kratky. Both work in a single bucket or storage container, require minimal equipment, and give you direct visibility into root health. This guide builds a DWC bucket system — the most popular first build — but the nutrient, pH, and lighting principles apply to every system type.
What you need: the full equipment list
A basic single-bucket DWC system needs the following. Costs are approximate.
| Product | Best for | Rating | Notes | |
|---|---|---|---|---|
| 5-gallon opaque bucket with lid | Reservoir and root chamber | ★★★★★ | Opaque buckets block light from reaching the nutrient solution, preventing algae growth. A white or black 5-gallon bucket with a matching lid is the standard. Avoid clear containers. | Check price |
| 3-inch or 4-inch net pots | Holding plants above the reservoir | ★★★★★ | Net pots sit in holes cut into the bucket lid. Plants are anchored in the pot with clay pebbles or rockwool while roots hang down into the nutrient solution below. | Check price |
| Air pump + airstone + tubing | Oxygenating the nutrient solution | ★★★★★ | An aquarium air pump rated for at least 5 gallons, a round airstone, and 4 feet of tubing. The air pump runs continuously to keep dissolved oxygen levels high enough to prevent root rot. | Check price |
| Hydroponic nutrients (3-part liquid) | Complete plant nutrition | ★★★★★ | General Hydroponics Flora series (FloraMicro, FloraGro, FloraBloom) is the industry standard. A starter kit runs $25-35 and lasts through dozens of grows. Mix ratios vary by growth stage. | Check price |
| pH meter or pH test kit | Monitoring and adjusting solution pH | ★★★★★ | A digital pH pen ($15-30) is faster and more accurate than test strips. Calibrate with pH 4.0 and 7.0 buffer solutions. The Apera Instruments PH20 or BlueLab Combo Pen are popular choices. | Check price |
| pH Up and pH Down solutions | Adjusting solution pH to target range | ★★★★★ | General Hydroponics pH Up and pH Down are concentrated solutions you add a few drops at a time. A small bottle of each lasts months. Always add pH adjuster to the full mixed nutrient solution, not to plain water. | Check price |
| Clay pebbles (hydroton) | Anchoring plants in net pots | ★★★★★ | Rinsed expanded clay pebbles fill the net pot around the plant stem and roots. They are reusable, pH-neutral, and provide excellent oxygen retention. Rinse thoroughly before first use to remove dust. | Check price |
| EC/TDS meter | Measuring nutrient concentration | ★★★★★ | A TDS (total dissolved solids) or EC (electrical conductivity) meter measures how much nutrient is in solution. Leafy greens thrive at 800-1200 ppm; fruiting plants want 1200-2000 ppm. Budget meters like the Vivosun or Bluelab run $15-30. | Check price |
Total cost for a single-bucket DWC system: $60–120, depending on the brand of nutrients and meters you choose. Add a grow light ($80–200) if growing indoors rather than under a sunny window.
Step 1: Build your DWC reservoir
The reservoir is the core of the system. All you need is a 5-gallon bucket, a lid with a net pot hole cut in it, and an air pump running continuously.
How to build it:
- Mark a circle on the bucket lid the same diameter as your net pot (3 inches or 4 inches). Use the net pot itself as a template.
- Cut the hole with a utility knife or a hole saw bit on a drill. A 3-inch hole saw is the cleanest method; a knife works but requires several passes.
- Sand or smooth the cut edge so no sharp plastic burrs damage plant stems.
- Cut a small notch in the rim of the lid for the air pump tubing to pass through — this allows the lid to seal tightly while the tubing runs out.
- Place the airstone at the bottom of the bucket. Run the tubing up through the lid notch and connect it to the air pump outside the bucket.
- Test the air pump: fill the bucket with plain water, plug in the pump, and confirm bubbles rise from the airstone. Replace the airstone if you see uneven bubbling.
Reservoir size note: A 5-gallon bucket holds approximately 3.5–4 gallons of nutrient solution after accounting for the root zone space at the top. For larger plants or hot environments where evaporation is fast, a 10-gallon reservoir gives you more buffer between water changes.
Step 2: Mix your first nutrient solution
Nutrients are the single most important variable in hydroponics. Unlike soil growing, there is no biological buffer — plants get exactly what you put in the water, no more and no less.
How to mix nutrients correctly:
- Start with your target water volume — for a 5-gallon bucket, mix enough for 3.5 gallons
- Fill your mixing container with plain tap water or reverse osmosis (RO) water
- Add each nutrient part one at a time, stirring between additions — never mix nutrient concentrates together directly before adding to water
- For the General Hydroponics Flora series in the vegetative stage, a common beginner ratio is: FloraMicro 3 mL/gal, FloraGro 9 mL/gal, FloraBloom 3 mL/gal
- Measure EC or TDS after mixing — target 800–1000 ppm for seedlings, 1000–1400 ppm for vegetative growth
- Check and adjust pH — add small amounts of pH Down (for most tap water) until you reach 5.8–6.0
- Add the mixed solution to your bucket reservoir
Water quality matters: Tap water with high EC (over 400 ppm) limits how much nutrient you can add before reaching toxic levels. If your tap water tests above 300–400 ppm, use filtered or RO water as a base. A basic RO filter attached to your tap runs $40–80 and pays for itself quickly in healthier plants.
Step 3: Set up grow lighting
Plants in a DIY hydroponic system grow only as fast as their light source allows. Hydroponics removes the soil constraint on growth — light is then the limiting factor.
Lighting requirements by plant type:
| Plant Type | Daily Light Integral (DLI) | Recommended Wattage (2x2 ft area) |
|---|---|---|
| Lettuce, spinach, herbs | 12–20 mol/m²/day | 100–150W LED |
| Tomatoes, peppers, cucumbers | 25–40 mol/m²/day | 200–300W LED |
| Fruiting trees, high-light crops | 40–60 mol/m²/day | 400W+ LED |
For a single bucket DWC growing lettuce or basil under a single LED panel, a 100W quantum board LED positioned 18–24 inches above the canopy is sufficient. Set the light on an 18-hour on / 6-hour off schedule using an outlet timer.
Signs of insufficient light: plants stretch vertically (etiolation), stems become thin and weak, leaf color turns pale. Signs of too much light: leaf tips bleach white, new growth cups upward, growth stalls. The fix for both is adjusting the distance between the light and the canopy.
For detailed guidance on choosing the right grow light, see LED vs fluorescent grow lights and best grow light bulbs.
Step 4: Germinate seeds and transplant into the system
The transition from soil germination to a hydroponic system is the step beginners most often rush. Plants need established roots before they can tolerate full-strength nutrients.
Recommended germination method for hydroponics:
- Soak a rockwool cube (1.5 inch size) in pH 5.5 water for 30 minutes
- Place one seed in the pre-made hole at the top of the cube, cover lightly
- Keep cubes in a tray covered with a humidity dome in a warm location (70–75°F)
- Seeds sprout in 2–5 days for most leafy greens; 5–10 days for tomatoes and peppers
- Once the seedling has visible roots poking from the bottom of the rockwool cube (typically 7–14 days after sprouting), it is ready to transfer
- Place the rockwool cube in the net pot surrounded by rinsed clay pebbles for support
- Lower the reservoir water level so the bottom of the net pot just touches the surface — as roots develop and reach the water, lower the level to leave a gap of 1–2 inches for oxygen
First days in the system: Start new transplants at half-strength nutrients (500–700 ppm) for the first week. Full-strength solution can stress underdeveloped root systems and cause nutrient burn on young leaves.
Step 5: Monitor pH and nutrients weekly
Consistency in pH and nutrient levels is what separates successful growers from frustrated ones. In a small reservoir, both can shift significantly in 3–4 days.
What to check, and how often:
| Parameter | Target Range | Check Frequency |
|---|---|---|
| pH | 5.5–6.2 | Every 2–3 days |
| EC/TDS | 800–1600 ppm (varies by stage) | Every 3–4 days |
| Water level | Roots touching but not submerged | Every 2–3 days |
| Water temperature | 65–72°F | Weekly |
The top-off rule: As plants consume water, top off the reservoir with plain pH-adjusted water (not more nutrient solution). Nutrients do not evaporate — only water does — so topping off with plain water prevents nutrient concentration from creeping too high between full water changes.
Full water change schedule: Change the entire reservoir every 7–14 days for most DWC systems. Dump the old solution, rinse the bucket and airstone, and mix fresh nutrient solution. This prevents salt buildup, resets nutrient ratios, and removes any dead organic matter that could harbor pathogens.
Step 6: Harvest and reset your system
Leafy greens like lettuce and spinach can be harvested by the leaf (cut-and-come-again method) starting around 3 weeks, or as a full head at 4–6 weeks. Herbs like basil can be harvested continuously by pinching off the top 2–3 inches, which encourages branching and prolongs harvest for months.
After harvest:
- Remove all plant material including roots from the bucket
- Clean the bucket, lid, net pots, and airstone with a diluted bleach solution (1 tablespoon per gallon) or hydrogen peroxide (3% concentration)
- Rinse all parts thoroughly with plain water
- Rinse clay pebbles and soak in pH-adjusted water before reuse
- Start fresh with a new germinated seedling and a new batch of nutrient solution
Cleaning between grows prevents pythium (root rot) and other water-borne pathogens from carrying over to the next crop. This is the most commonly skipped step — and the one most responsible for mysterious failures in subsequent grows.
Troubleshooting common DWC problems
Brown, slimy roots (root rot / pythium) Root rot is caused by warm water temperatures, low dissolved oxygen, or light leaks into the reservoir. Fix: ensure water temp stays below 72°F, verify the airstone is producing vigorous bubbles, and check all light leaks around the lid and fittings. Add 3% hydrogen peroxide (2-3 mL per gallon) to the reservoir as a short-term treatment.
Yellow lower leaves with green top growth This pattern typically indicates a nitrogen deficiency. Check that nutrient concentration is in range (EC/TDS) and that pH is between 5.5–6.2 — nitrogen uptake is blocked outside this range even when nutrients are present. Adjust pH first; if TDS is low, increase nutrient concentration slightly.
White crust forming on net pots or the bucket rim Salt buildup from nutrient solution evaporation. This is cosmetic but indicates the bucket is not fully sealed from light and air. Wipe off with a damp cloth and seal any gaps in the lid with black tape.
Plants wilting despite adequate water Wilting in hydroponics with a full reservoir usually means root rot or severely depleted dissolved oxygen. Check root color (healthy roots are white; rotted roots are brown and slimy). Increase aeration, lower water temperature, and consider a full reservoir change with added hydrogen peroxide.
FAQ
Frequently asked questions
How much does a DIY hydroponics system cost to build?
What is the easiest plant to grow hydroponically for beginners?
Do I need a grow light for DIY hydroponics?
How often do I need to change the nutrient solution in a DWC bucket?
What pH should my hydroponic nutrient solution be?
Can I reuse clay pebbles between grows?
Bottom line
A DIY hydroponics system is one of the most practical indoor garden projects you can build. For under $150, a single deep water culture bucket will produce fresh lettuce, basil, or spinach faster and more reliably than any soil pot on a windowsill. The keys to success are consistent pH management (5.5–6.2), adequate dissolved oxygen from a running air pump, and a weekly routine of checking and topping off the reservoir.
Start with one bucket and one type of plant. Master the pH and nutrient routine, observe how the roots develop, and then scale up to a multi-bucket system or move into NFT channels once you have a successful harvest behind you.
For related guidance: hydroponics vs soil gardening, best hydroponic systems, how to set up a grow tent, and best indoor grow kits for beginners.