guides
How to Grow Sprouts Indoors: Step-by-Step Guide
Grow fresh alfalfa, broccoli, and mung bean sprouts at home in 3-7 days with no soil or grow lights — just a jar, water, and 2 minutes daily.
 Priya Anand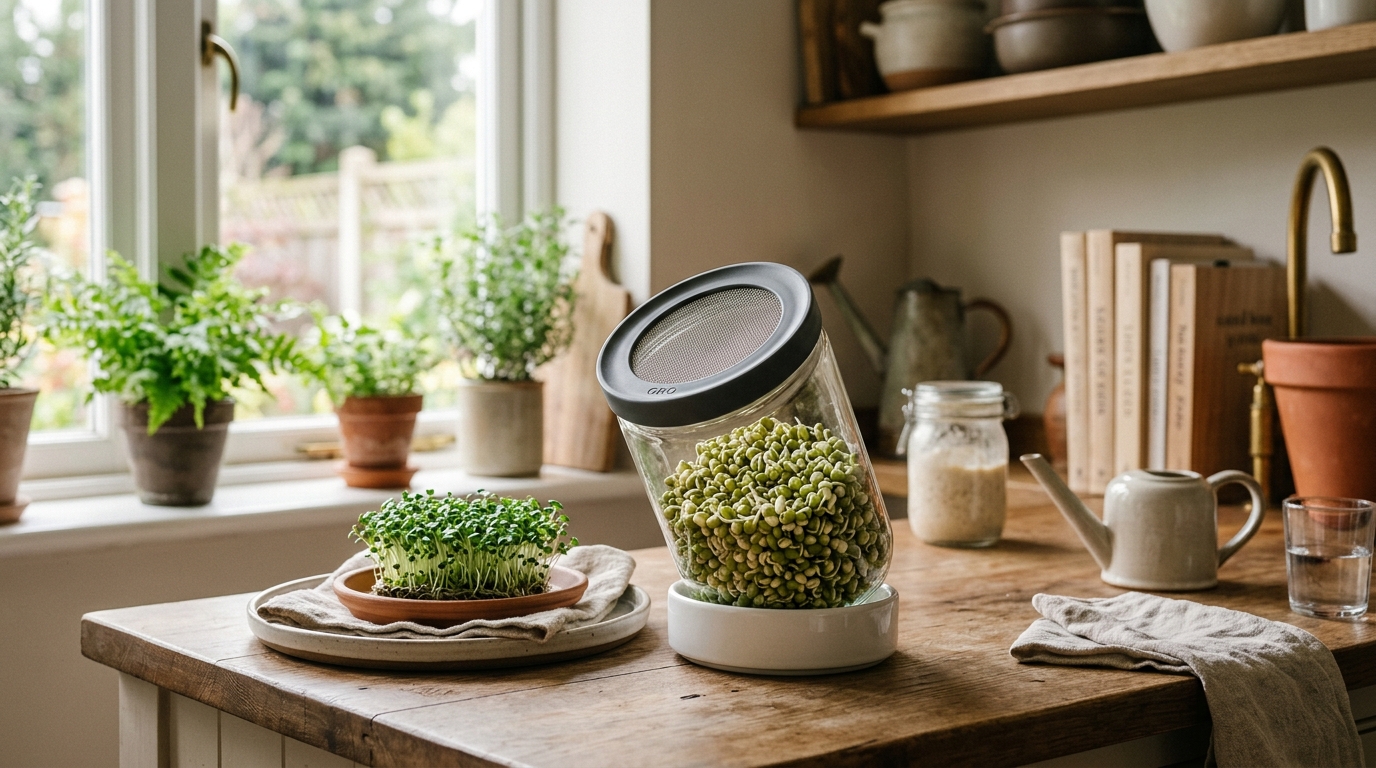
Growing sprouts indoors takes 3–7 days from seed to harvest with no soil, no grow lights, and no special equipment. Alfalfa and broccoli sprouts are the best starting point — both germinate reliably in a standard mason jar, rinse in under two minutes twice a day, and produce a dense, nutritious harvest ready before the end of the week.
What are sprouts — and how are they different from microgreens?
Sprouts are germinated seeds harvested and eaten whole — root, stem, hull, and all — typically 3–7 days after the initial soaking. They grow entirely in water with no soil, no growing medium, and no light required until the final day before harvest. Everything the sprout needs to develop comes from energy stored inside the seed itself.
Microgreens are grown in soil or a growing medium, cut above the root line at the first-leaf stage, and typically take 7–14 days from sowing. Sprouts are faster, cheaper, and need zero equipment beyond a jar. Microgreens produce more diverse flavors and textures and keep longer in the refrigerator after harvest.
The two are complementary, not competing. Sprouts are the ideal starting point — the entire process is in a single jar on your counter. If you enjoy growing sprouts, see how to grow microgreens for a natural next step that adds trays and a thin layer of soil.
What you need to grow sprouts
| Product | Best for | Rating | Notes | |
|---|---|---|---|---|
| Wide-mouth mason jar (quart or half-gallon) | Most versatile and reusable sprouting vessel | ★★★★★ | A quart jar works for alfalfa and small seeds; a half-gallon jar handles larger seeds like mung beans and lentils. Use any glass mason jar you already own. | Check price |
| Stainless steel sprouting lid or mesh screen | Allows rinsing and drainage without losing seeds | ★★★★★ | Stainless steel sprouting lids with multiple mesh sizes fit standard mason jar rims and last years. Cheesecloth secured with a rubber band works as a free alternative. | Check price |
| Organic sprouting seeds | Food-safe untreated seeds with high germination rates | ★★★★★ | Always buy seeds labeled for sprouting or food use — garden seeds are often treated with fungicides not safe for consumption. Look for broccoli, alfalfa, mung bean, lentil, and radish varieties. | Check price |
| Multi-tier sprouting tray system | Growing multiple varieties at the same time | ★★★★★ | Multi-tier sprouting trays let you stagger varieties at different stages. More setup than a jar but ideal if you want a continuous daily harvest of 2-3 varieties at once. | Check price |
Total startup cost: under $15 if you already own a mason jar. Sprouting seeds run $8–15 per pound and yield many harvests — a single tablespoon of alfalfa seeds fills a quart jar.
Step 1: Choose your sprouting seeds
The variety you pick determines how long your sprouts take and what they taste like. Start with one of these reliable options:
Best beginner sprouting seeds:
- Alfalfa — tiny seeds, mild and grassy flavor, ready in 5–6 days; the classic deli sandwich sprout; soak only 6–8 hours before starting
- Broccoli — small seeds, slightly spicy, nutritionally dense; ready in 4–6 days; widely available as certified organic; no pre-soak needed for small batches
- Mung beans — large beans, mild and crunchy; ready in 3–5 days; the sprout used in stir-fries and pad thai; soak 10–12 hours before starting
- Lentils — earthy and satisfying texture; ready in 3–5 days; use whole (not split) lentils from the grocery store; soak 8–12 hours
- Radish — spicy and peppery; ready in 4–6 days; excellent mixed with milder alfalfa or clover
Varieties to try after your first successful grow:
- Clover, fenugreek, adzuki beans, wheat berries, sunflower (hull-less variety only)
Never use for sprouting:
- Seeds labeled “for planting only” — most are coated with fungicides that are not safe for consumption
- Nightshade seeds (tomato, potato, pepper) — toxic compounds make these unsafe to sprout for eating
- Canned or pre-cooked legumes — they will not germinate
Seed amount per quart jar: 1–2 tablespoons for small seeds like alfalfa and broccoli; 1/4 cup for medium seeds like radish; 1/3 cup for large seeds like mung beans and lentils. The seeds expand significantly during soaking and again as they sprout — overcrowding a jar causes poor airflow and increases mold risk.
Step 2: Soak your seeds
- Measure the appropriate amount of seeds and add them to a clean, dry mason jar.
- Fill the jar with cool water — roughly 3 times the volume of the seeds.
- Cover the jar opening with the sprouting lid or a piece of cheesecloth secured with a rubber band.
- Soak at room temperature (65–75°F is ideal) for the appropriate time:
- Small seeds (alfalfa, broccoli, radish): 6–8 hours
- Medium seeds (sunflower, fenugreek): 8–10 hours
- Large seeds (mung beans, lentils, chickpeas): 10–12 hours
- After soaking, drain the water completely through the sprouting lid. Rinse with fresh cool water and drain again thoroughly before inverting the jar.
The soaked seeds will have swollen visibly and some may already have tiny cracks in the seed coat — this is exactly right. Germination has begun.
Step 3: Rinse and drain twice daily
After the initial soak and first drain, the entire ongoing care routine is two rinses per day and takes about two minutes each:
- Morning rinse: Fill the jar halfway with cool water, swirl gently for 15–20 seconds, then drain completely through the sprouting lid. Invert the jar at a 45-degree angle in a bowl or on a dish rack and leave it to drain for 30–60 minutes.
- Evening rinse: Repeat — fill, swirl, drain, invert.
- Keep the jar away from direct sun during the main growing phase. A countertop or shelf at room temperature between 65–75°F works perfectly. Avoid warm spots near the stove or in direct afternoon sun, which can overheat the jar and encourage bacterial growth.
The twice-daily rinse serves two purposes: it flushes away metabolic waste that accumulates around the seeds, and it supplies a fresh supply of oxygen to the germinating sprouts. Skipping even one rinse cycle in warm weather — above 75°F — can allow enough heat and waste buildup to spoil a batch within hours.
Between rinses, the inverted jar should rest at an angle so air circulates freely through the mesh lid and any remaining water drains out. Seeds that sit in standing water between rinse cycles become waterlogged and fail to develop correctly.
Step 4: Watch for growth and identify problems early
By day 2–3, you will see white root tails (radicles) emerging from each seed. These are the primary root emerging before the shoot. Root hairs — very fine, white, fuzzy filaments along the radicle — are normal and healthy, not mold.
Signs your batch is on track:
- Seeds have swollen and white tails are emerging by day 2
- A clean, fresh smell similar to watermelon rind or cucumber
- Seeds have spread somewhat through the jar rather than clumping in a solid mass
Signs of a problem — act immediately:
- Slimy texture when you handle the seeds: rinse more thoroughly for 30 seconds and increase to three rinses per day
- Pink or orange coloring on seeds: bacterial contamination; discard the batch, sterilize the jar, and restart
- Gray or green fuzzy coating on seeds or jar walls: mold; discard the batch
- Strong sour or musty smell: mold or bacterial overgrowth; discard
If you are sprouting in warm summer weather above 75°F, rinse three times per day rather than two. Higher temperatures accelerate metabolism and increase heat buildup, which creates conditions for spoilage faster than at cooler temperatures.
Step 5: Expose to indirect light for the final 24 hours
Sprouts develop entirely from stored seed energy and do not need light during the main growing phase. But moving the jar to indirect natural light or near a low-intensity lamp for the final 18–24 hours before harvest triggers chlorophyll production, turning the sprouts from pale yellow-white to vivid green.
This step makes a noticeable difference in flavor, appearance, and nutritional content — particularly for alfalfa and broccoli sprouts:
- After your second-to-last rinse of the growth cycle, move the jar to a bright windowsill or under a lamp — but not in direct sun, which overheats the jar rapidly.
- Continue the normal rinse once more and drain well.
- Harvest within the next 24 hours once the sprouts have turned green.
The light exposure step is optional, not required. Pale, unhulled sprouts are nutritious and perfectly edible — but if you have a bright window available, the extra day of light is worth it.
Step 6: Harvest and store your sprouts
Sprouts are ready to harvest when:
- Most seeds have visible shoots of at least 1/4 to 1/2 inch; alfalfa and broccoli sprouts reach 1 to 1.5 inches
- The jar is noticeably fuller than when you started — typically 4–8 times the original seed volume
- The smell is clean and faintly grassy or vegetal
How to harvest:
- Rinse the completed batch thoroughly under cool running water.
- For small seeds like alfalfa, spread the sprouts in a large bowl of water and swirl gently — empty seed hulls float to the surface and can be skimmed off. Hulls are harmless to eat but can be slightly bitter.
- Drain thoroughly in a colander for 10–15 minutes, shaking occasionally to release trapped water.
- Spin dry in a salad spinner or pat gently with a clean towel.
- Store in a sealed container or zip-lock bag in the refrigerator.
Refrigerator storage: Well-dried sprouts keep for 5–7 days. The drier you get them before storage, the longer they will last. Rinse briefly under cool water again before eating if you prefer — this refreshes them and removes any accumulated off-flavors.
Recommended sprouting products
Best for Best starter seed collection
Handy Pantry Organic Sprouting Seeds Variety Pack
A variety pack covering alfalfa, broccoli, mung bean, and radish lets you try multiple varieties in the first week. All seeds are certified organic and tested for germination rates above 95%.
★★★★★ 4.8 · 3,200 reviews
Check current price on Amazon→Best for Best sprouting lid set
Stainless Steel Sprouting Lids for Mason Jars
A set of stainless mesh sprouting lids in fine and coarse mesh sizes handles both small alfalfa seeds and large beans without losing any through the screen. Rust-proof and dishwasher-safe for long-term use.
★★★★★ 4.7 · 2,800 reviews
Check current price on Amazon→Best for Best for growing multiple varieties at once
3-Tier Sprouting Tray Kit
Stacked trays let you run three varieties at different stages simultaneously for a continuous daily harvest. Built-in drainage channels make rinsing faster than tilting mason jars.
★★★★★ 4.6 · 1,400 reviews
Check current price on Amazon→Troubleshooting common sprouting problems
Mold on seeds or jar walls — almost always caused by insufficient drainage between rinses, too-infrequent rinsing in warm weather, or seeds that were not thoroughly drained after the initial soak. Discard the batch, sterilize the jar with diluted white vinegar or a brief bleach rinse, dry completely, and restart with fresh seeds. Rinse three times daily in summer.
No germination after 2–3 days — usually old seeds past their viability window or seeds treated with fungicide for planting use. Source fresh seeds from a dedicated sprouting supplier and store unused seeds in an airtight jar in the refrigerator to extend viability for 1–2 years.
Slimy seeds between rinse cycles — caused by insufficient rinsing or poor airflow in the jar. Rinse more thoroughly — swirl for a full 30 seconds — and ensure the jar drains fully when inverted. A mesh lid with slightly larger holes can also improve airflow between rinses.
Sprouts drying out between rinses — the jar is in a warm, dry spot with too much air movement. Try a more sheltered countertop location or increase to three rinses daily. Seeds should feel damp but not waterlogged between cycles.
Uneven germination across the jar — normal for mixed seed sizes or slightly older seed lots. Most seeds catch up within 24 hours. Accept the batch variation or sort seeds to a more consistent size before soaking next time.
Sprouts taste bitter — usually over-mature sprouts past peak harvest time, or high hull content in alfalfa and clover. Harvest earlier in the next batch and take extra time to float off seed hulls in a bowl of water before refrigerating.
FAQ
Frequently asked questions
Are homegrown sprouts safe to eat?
Do sprouts need sunlight to grow?
How long do homegrown sprouts last in the refrigerator?
What is the difference between sprouts and microgreens?
Can I sprout regular grocery store lentils and mung beans?
How much does it cost to grow sprouts at home?
Bottom line
Growing sprouts at home is one of the fastest and most rewarding food projects you can start today. A mason jar, a sprouting lid, and a tablespoon of seeds are the entire investment, and you will have fresh sprouts on the counter in under a week. Start with alfalfa or broccoli for the simplest first batch, add mung beans once the routine feels natural, and stagger two jars a few days apart to keep a continuous supply going.
For more indoor growing projects, see how to grow microgreens, how to start seeds indoors, what to grow indoors, and the indoor gardening setup guide.